Elite-Pi Usage Guide
What is the Elite-Pi?
The Elite-Pi is an RP2040-based controller with a Pro Micro/Elite-C compatible pinout that's primarily intended for use with keyboards.
You can purchase them at your favorite keyboard store: Elite-Pi at Keebio
Features
- Microcontroller: RP2040
- Flash Memory: 16Mbit (W25Q16JVUXIQ)
- Pinout: Pro Micro-compatible
- Number of available pins: Up to 25 I/O pins
- Firmware Support: QMK, KMK, CircuitPython
- Mid-mount USB-C to keep low-profile
- Availability: Elite-Pi at Keebio
Advantages over Pro Micro/Elite-C
In comparison to the Pro Micro or Elite-C, the Elite-Pi provides a few advantages over them:
- Flash memory: Lots of space to compile in various QMK features without worry, as the Elite-Pi has much more flash memory
- Price: Since the RP2040 microcontroller costs less than the ATmega32u4, we can provide it at a lower price than the Elite-C
- Flashing: Instead of using QMK Toolbox, you can just copy a complied
.uf2file to the Elite-Pi to update the firmware
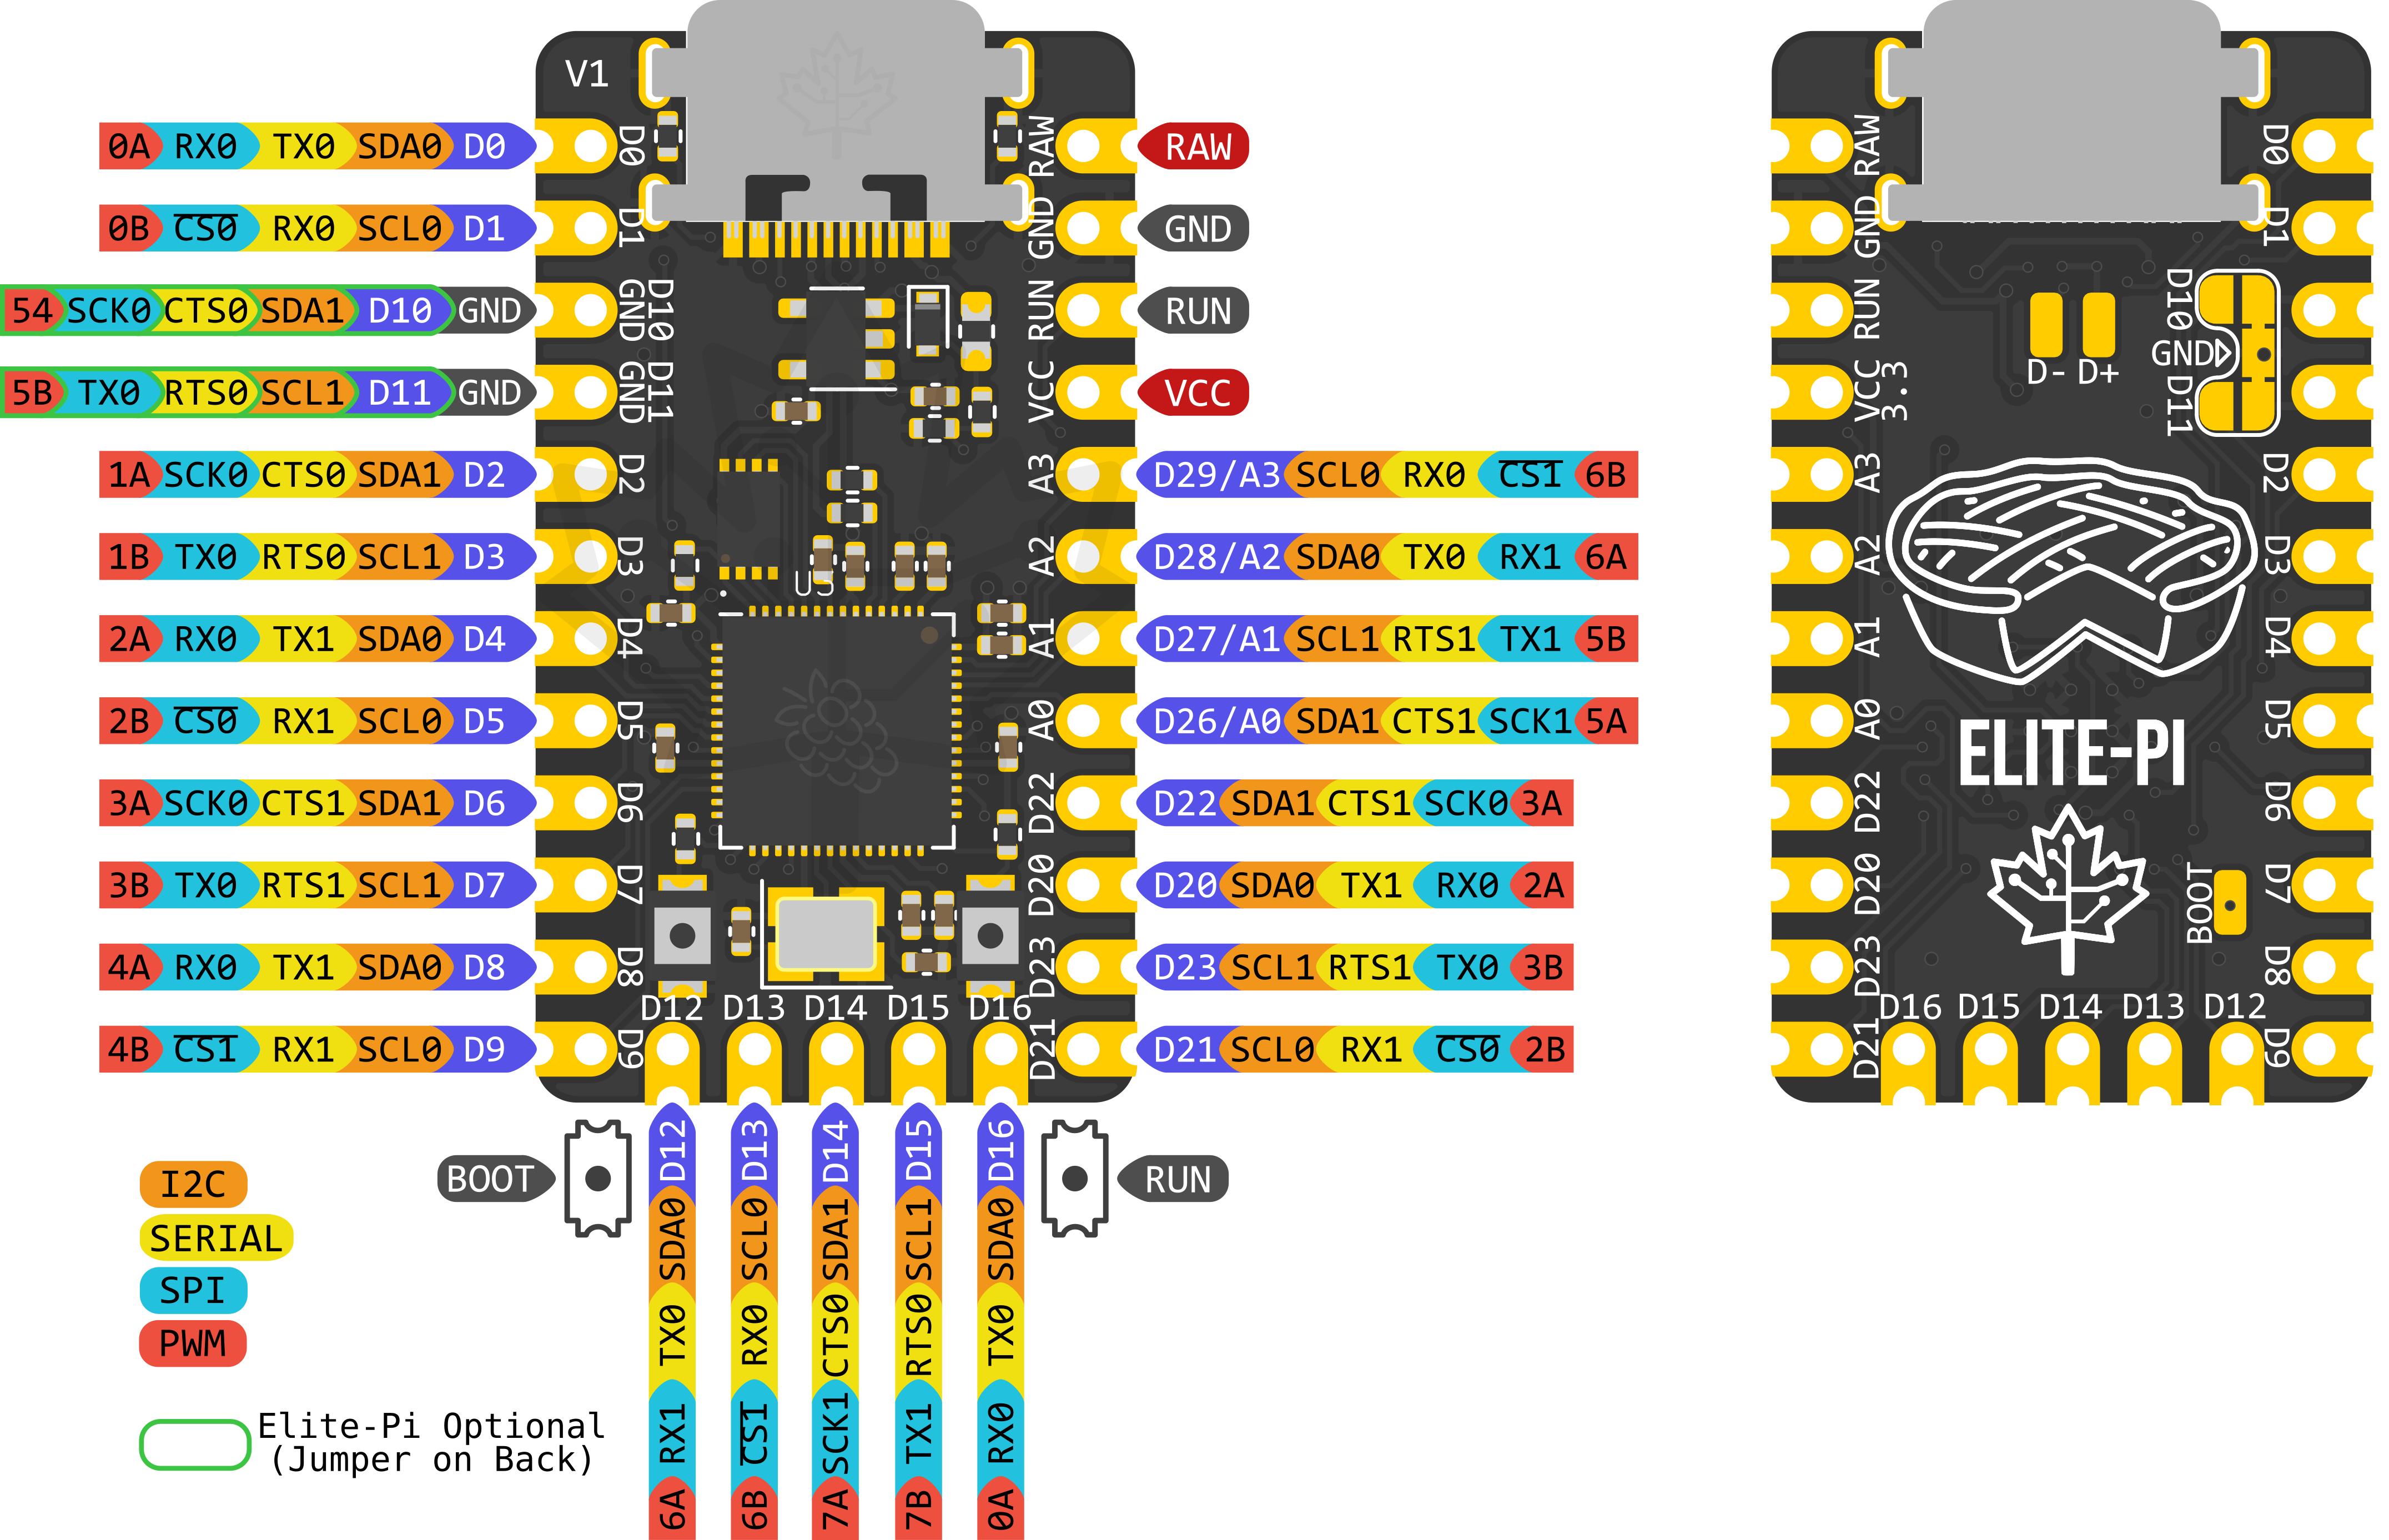
Pinout

Usage Information
QMK Firmware
The recommended way to use the Elite-Pi is using a converter in QMK. Note that you will not be able to take a .hex file compiled for a Pro Micro (ATmega32u4) and rename it as a .uf2 file, it just doesn't work that way. In either usage case, you will need a QMK build environment setup.
Converters
If you are using the Elite-Pi on a Pro Micro-compatible board, then you can use a converter in QMK to map the pins correctly to the PCB.
To use the converter, see the instructions here: QMK converter usage
Examples:
Using QMK CLI:
qmk compile -c -kb keebio/levinson/rev3 -km default -e CONVERT_TO=elite_pi
Using make:
make keebio/levinson/rev3:default CONVERT_TO=elite_pi
Without Converter
Alternatively, if you are creating a keyboard from scratch, you can use it as a RP2040 board as described here: QMK - RP2040 Info.
Reset/Boot
At the moment with V1 of the Elite-Pi, there are two buttons on it for Run/Reset and Boot, unlike the Elite-C, where there is only one button needed for Reset. The left button is for Boot, and the right button is for Run. You will mainly be interested in getting the Elite-Pi into bootloader mode, so please see the directions below for doing this.
In the future, we plan on reducing the Elite-Pi to have just one button to perform Run and Boot.
Flashing
The directions to flash the Elite-Pi can be found in the QMK Documentation in the Flashing section.
To repeat the information there, here's the steps:
- Enter bootloader mode (use one of the following methods):
- For a new Elite-Pi out of the packaging, it will already start in bootloader mode when plugged into the computer
- Double-tap the
Run/Resetbutton (if flashed and was compiled withRP2040_BOOTLOADER_DOUBLE_TAP_RESEToption)- If you used the converter mentioned above, it will have this option enabled
- Hold the
Bootbutton (the left button) down, press theRunbutton (the right button), and release both buttons - Hold the
Bootbutton (the left button) down, while pluging in the USB-C cable - Press the
QK_BOOTkeycode (if present on a flashed keyboard)
- Wait for OS to detect the Elite-Pi
- It will show up as a USB mass-storage device named
RPI-RP2
- It will show up as a USB mass-storage device named
- Copy the
.uf2file to theRPI-RP2USB drive
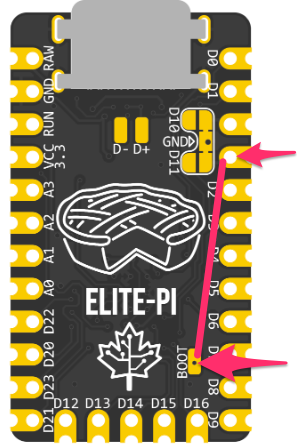
If you have the Elite-Pi installed with the back facing towards you, and you need to press Boot, take a wire and connect the Boot pad on the back and a GND pad, as shown below:

Additional Info
Can I use this on just one half of a split keyboard and use a Pro Micro on the other half?
No, you can not mix the Elite-Pi with a non-RP2040 controller like the Pro Micro or Elite-C.
However, another RP2040 controller can be used with it.
Accessing D10/D11 via side pads
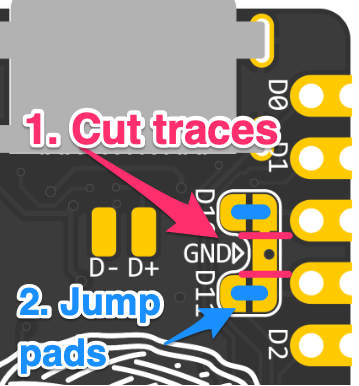
If you would like to access D10 and/or D11 via the pads on the side of the Elite-Pi, you will need to cut the traces connecting GND to the those pads, as by default, the side pads are connected to GND to match the normal Pro Micro pinout. After cutting the traces, add solder as shown below to jump D10/D11.

CircuitPython
The Elite-Pi can be used with CircuitPython, and since the hardware is the same as that of the Raspberry Pi Pico, you can use CircuitPython build for it: CircuitPython for Raspberry Pi Pico