FoldKB Rev. 2
This build guide is for the FoldKB Rev. 2 which has the Kailh hotswap sockets. If you have the Rev. 1 PCBs, see the FoldKB Rev. 1 build guide.
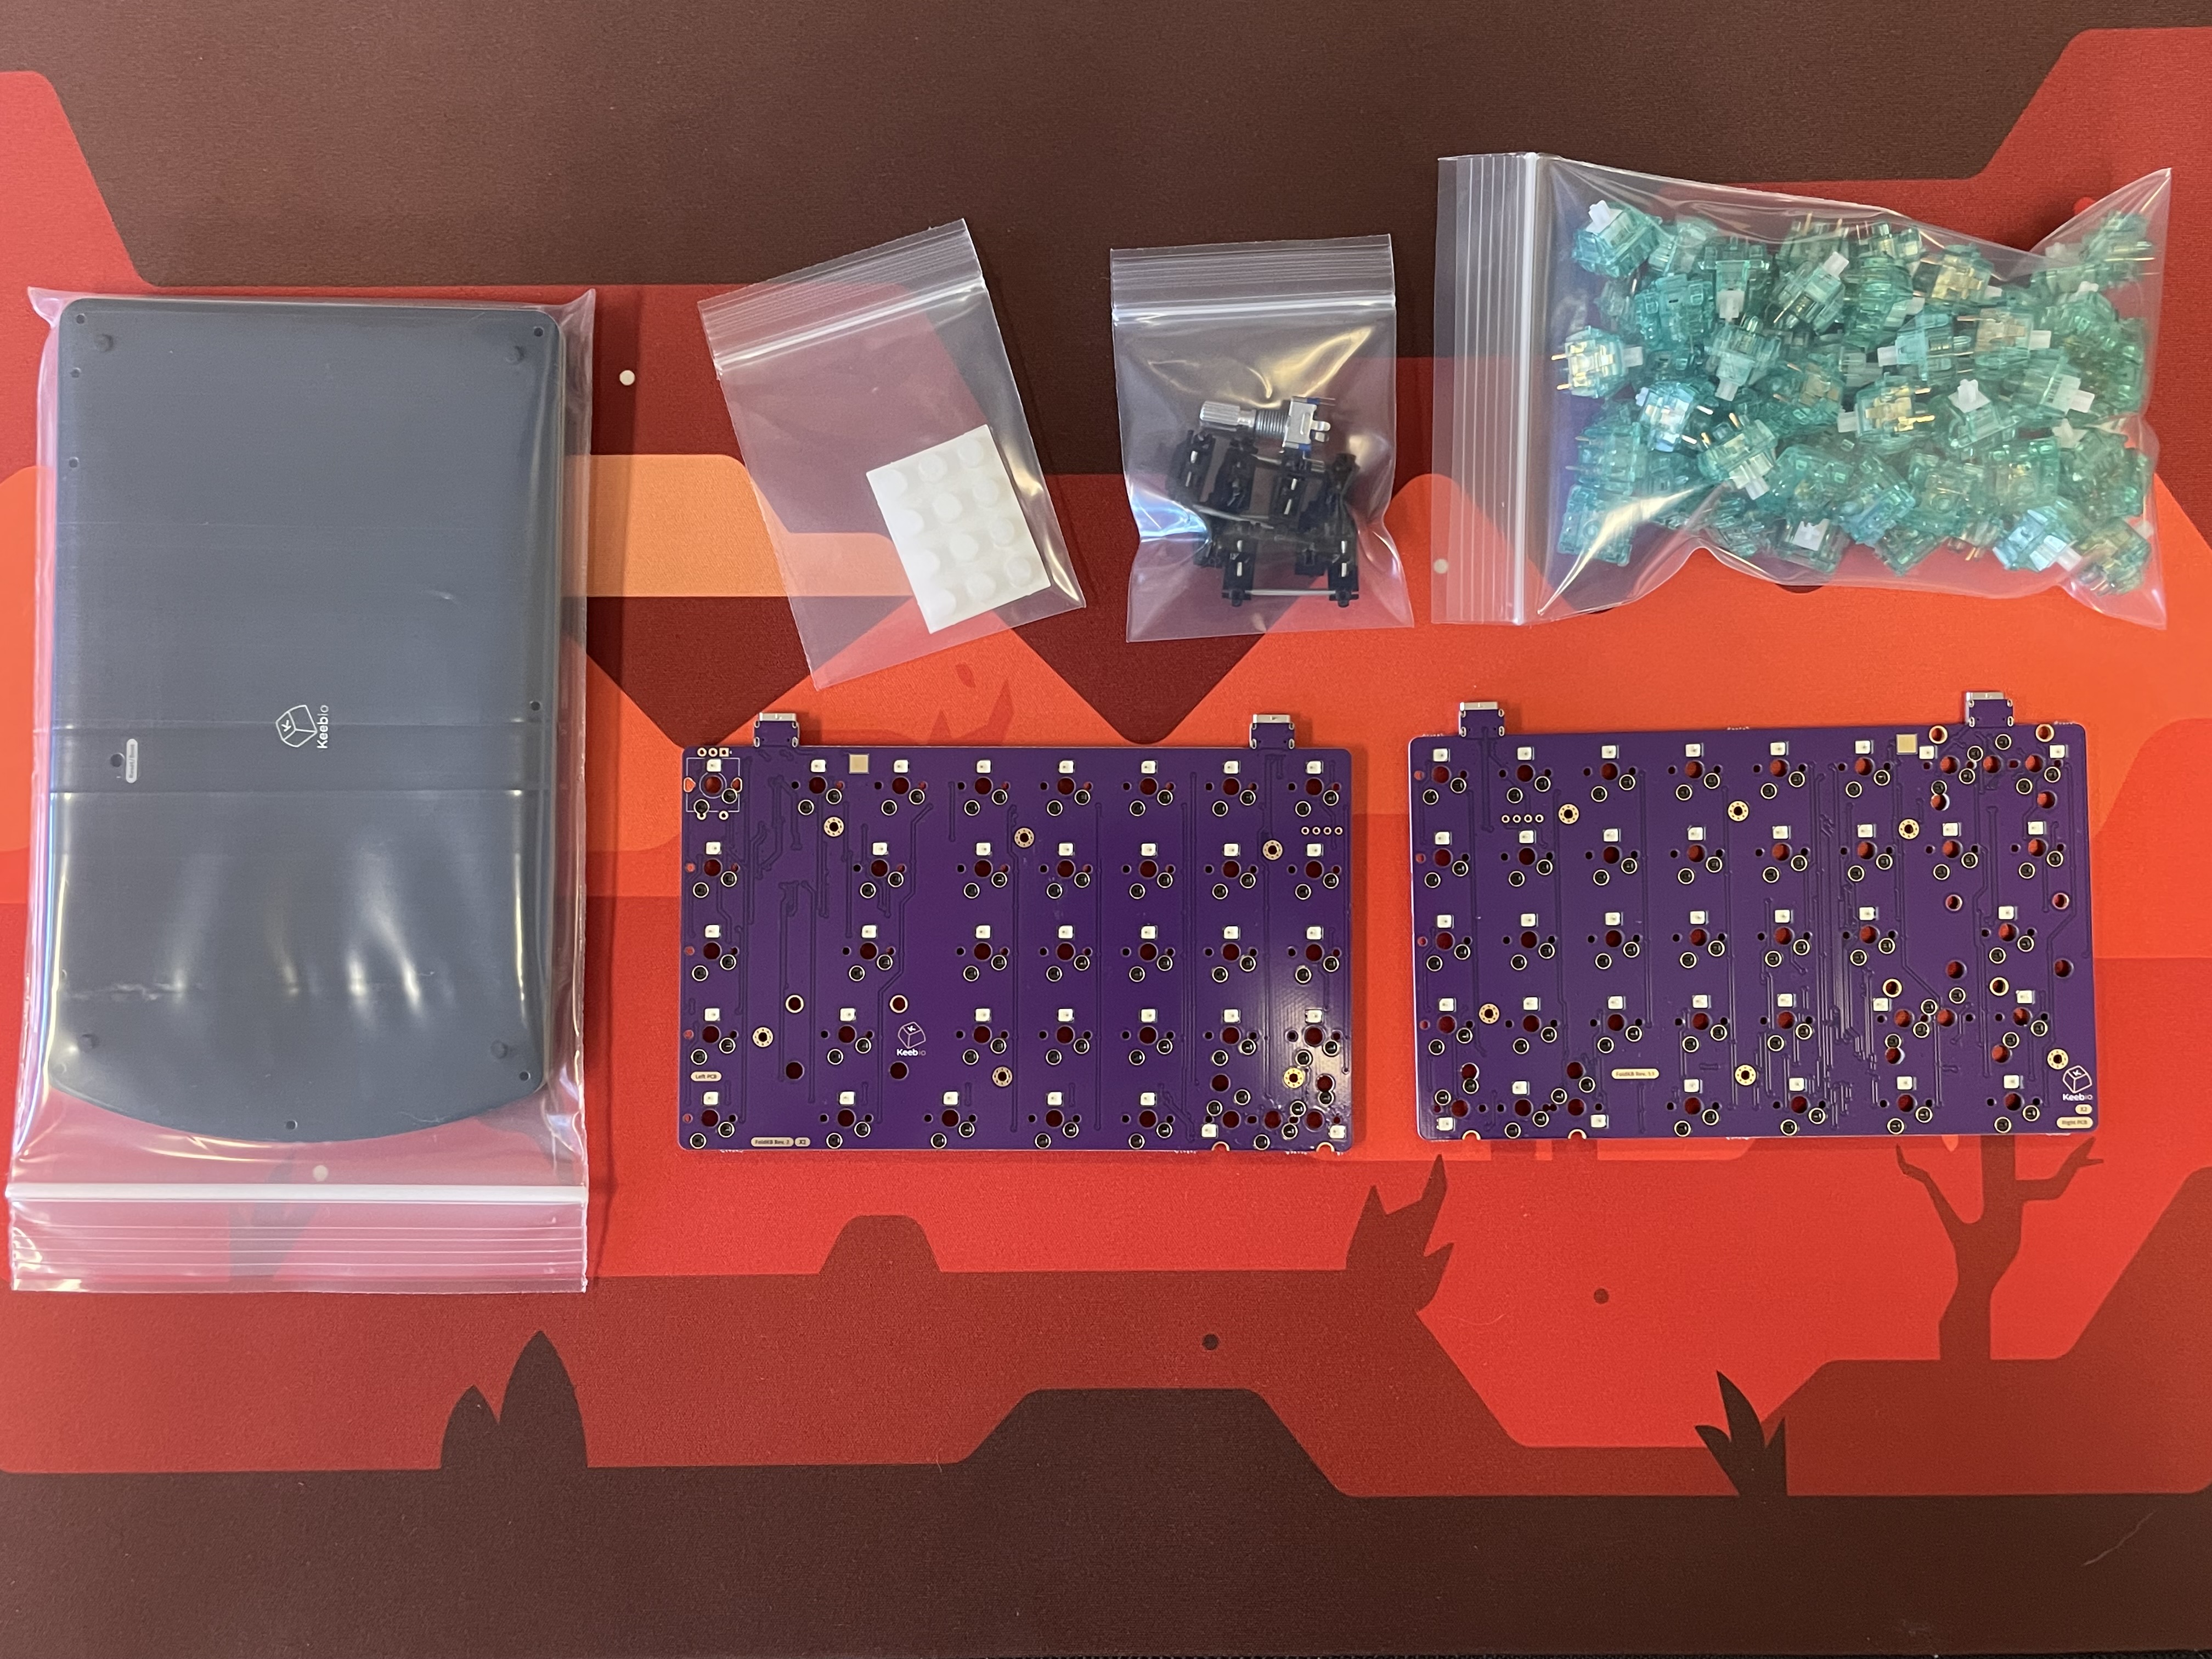
Parts List
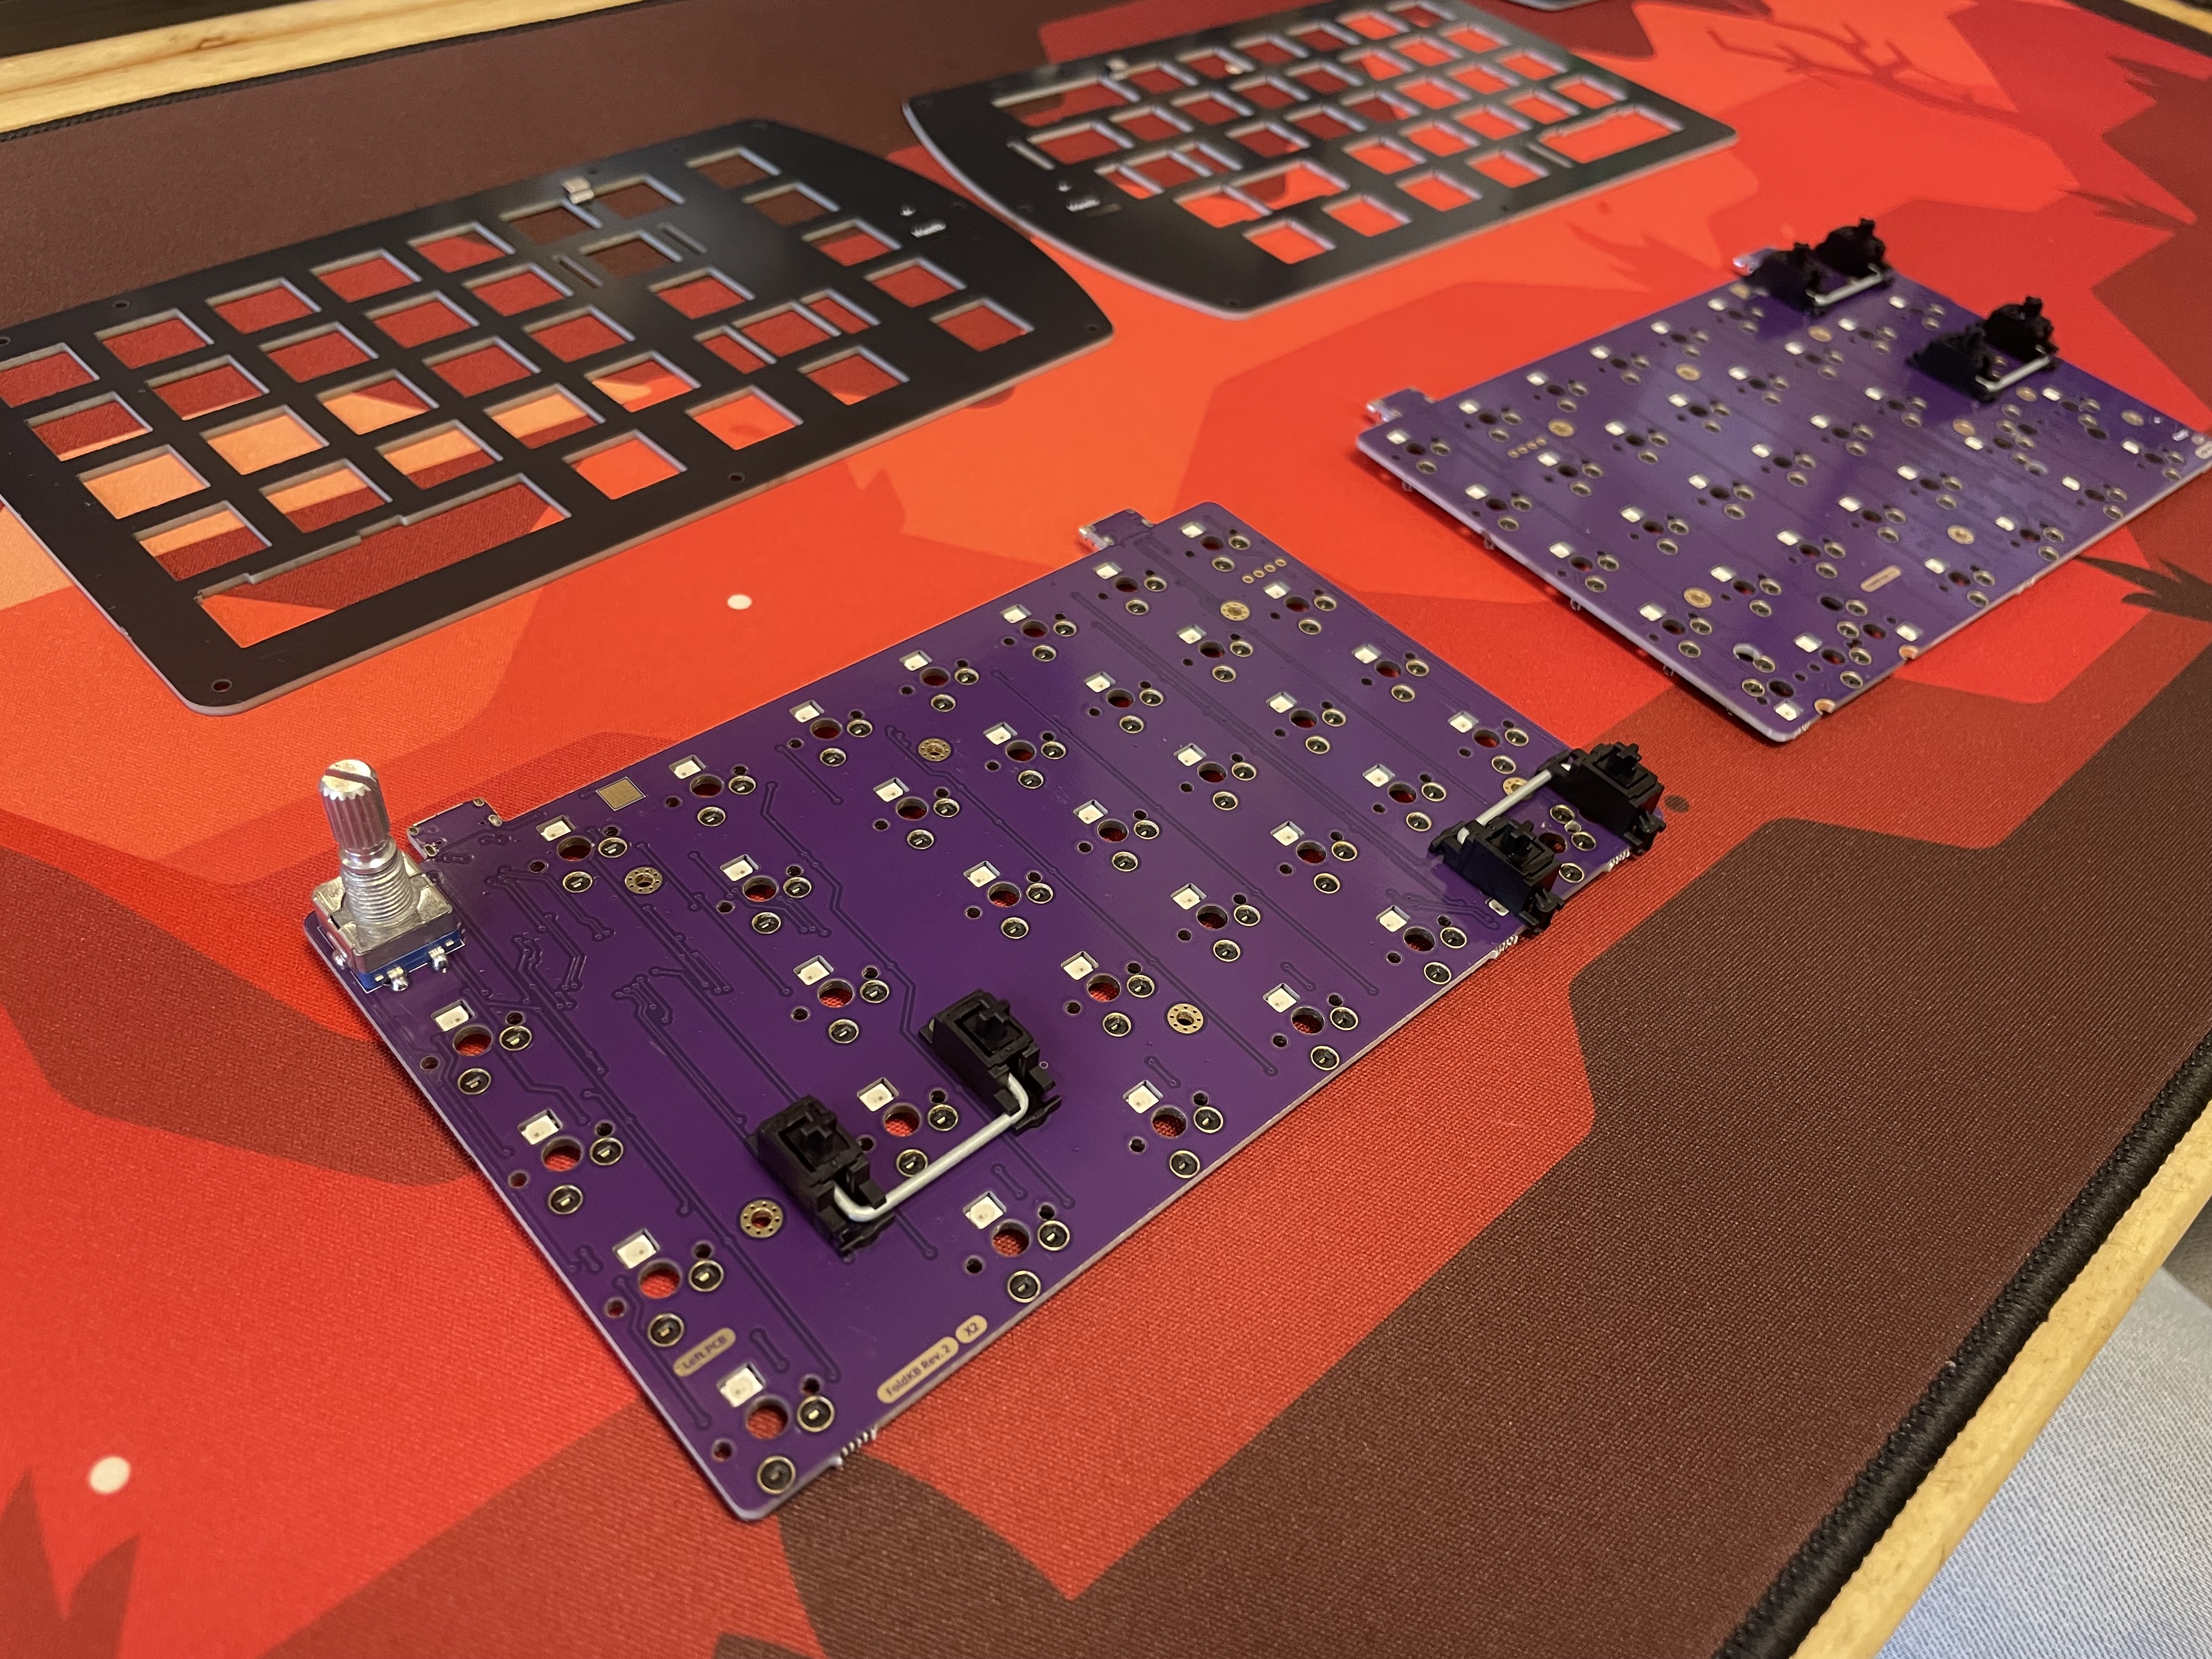
- FoldKB Rev. 2 PCBs
- Plates for FoldKB
- USB-C to USB-C cable
- MX-compatible Switches
- 2u PCB mount MX stabilizers if using 2u/2.25u/2.75u keys (need between 2 and 6 stabilizers)
- Rotary Encoder and Knob (optional)
- FLAHNS Hotswap Bumpers (recommended)
- Keycaps
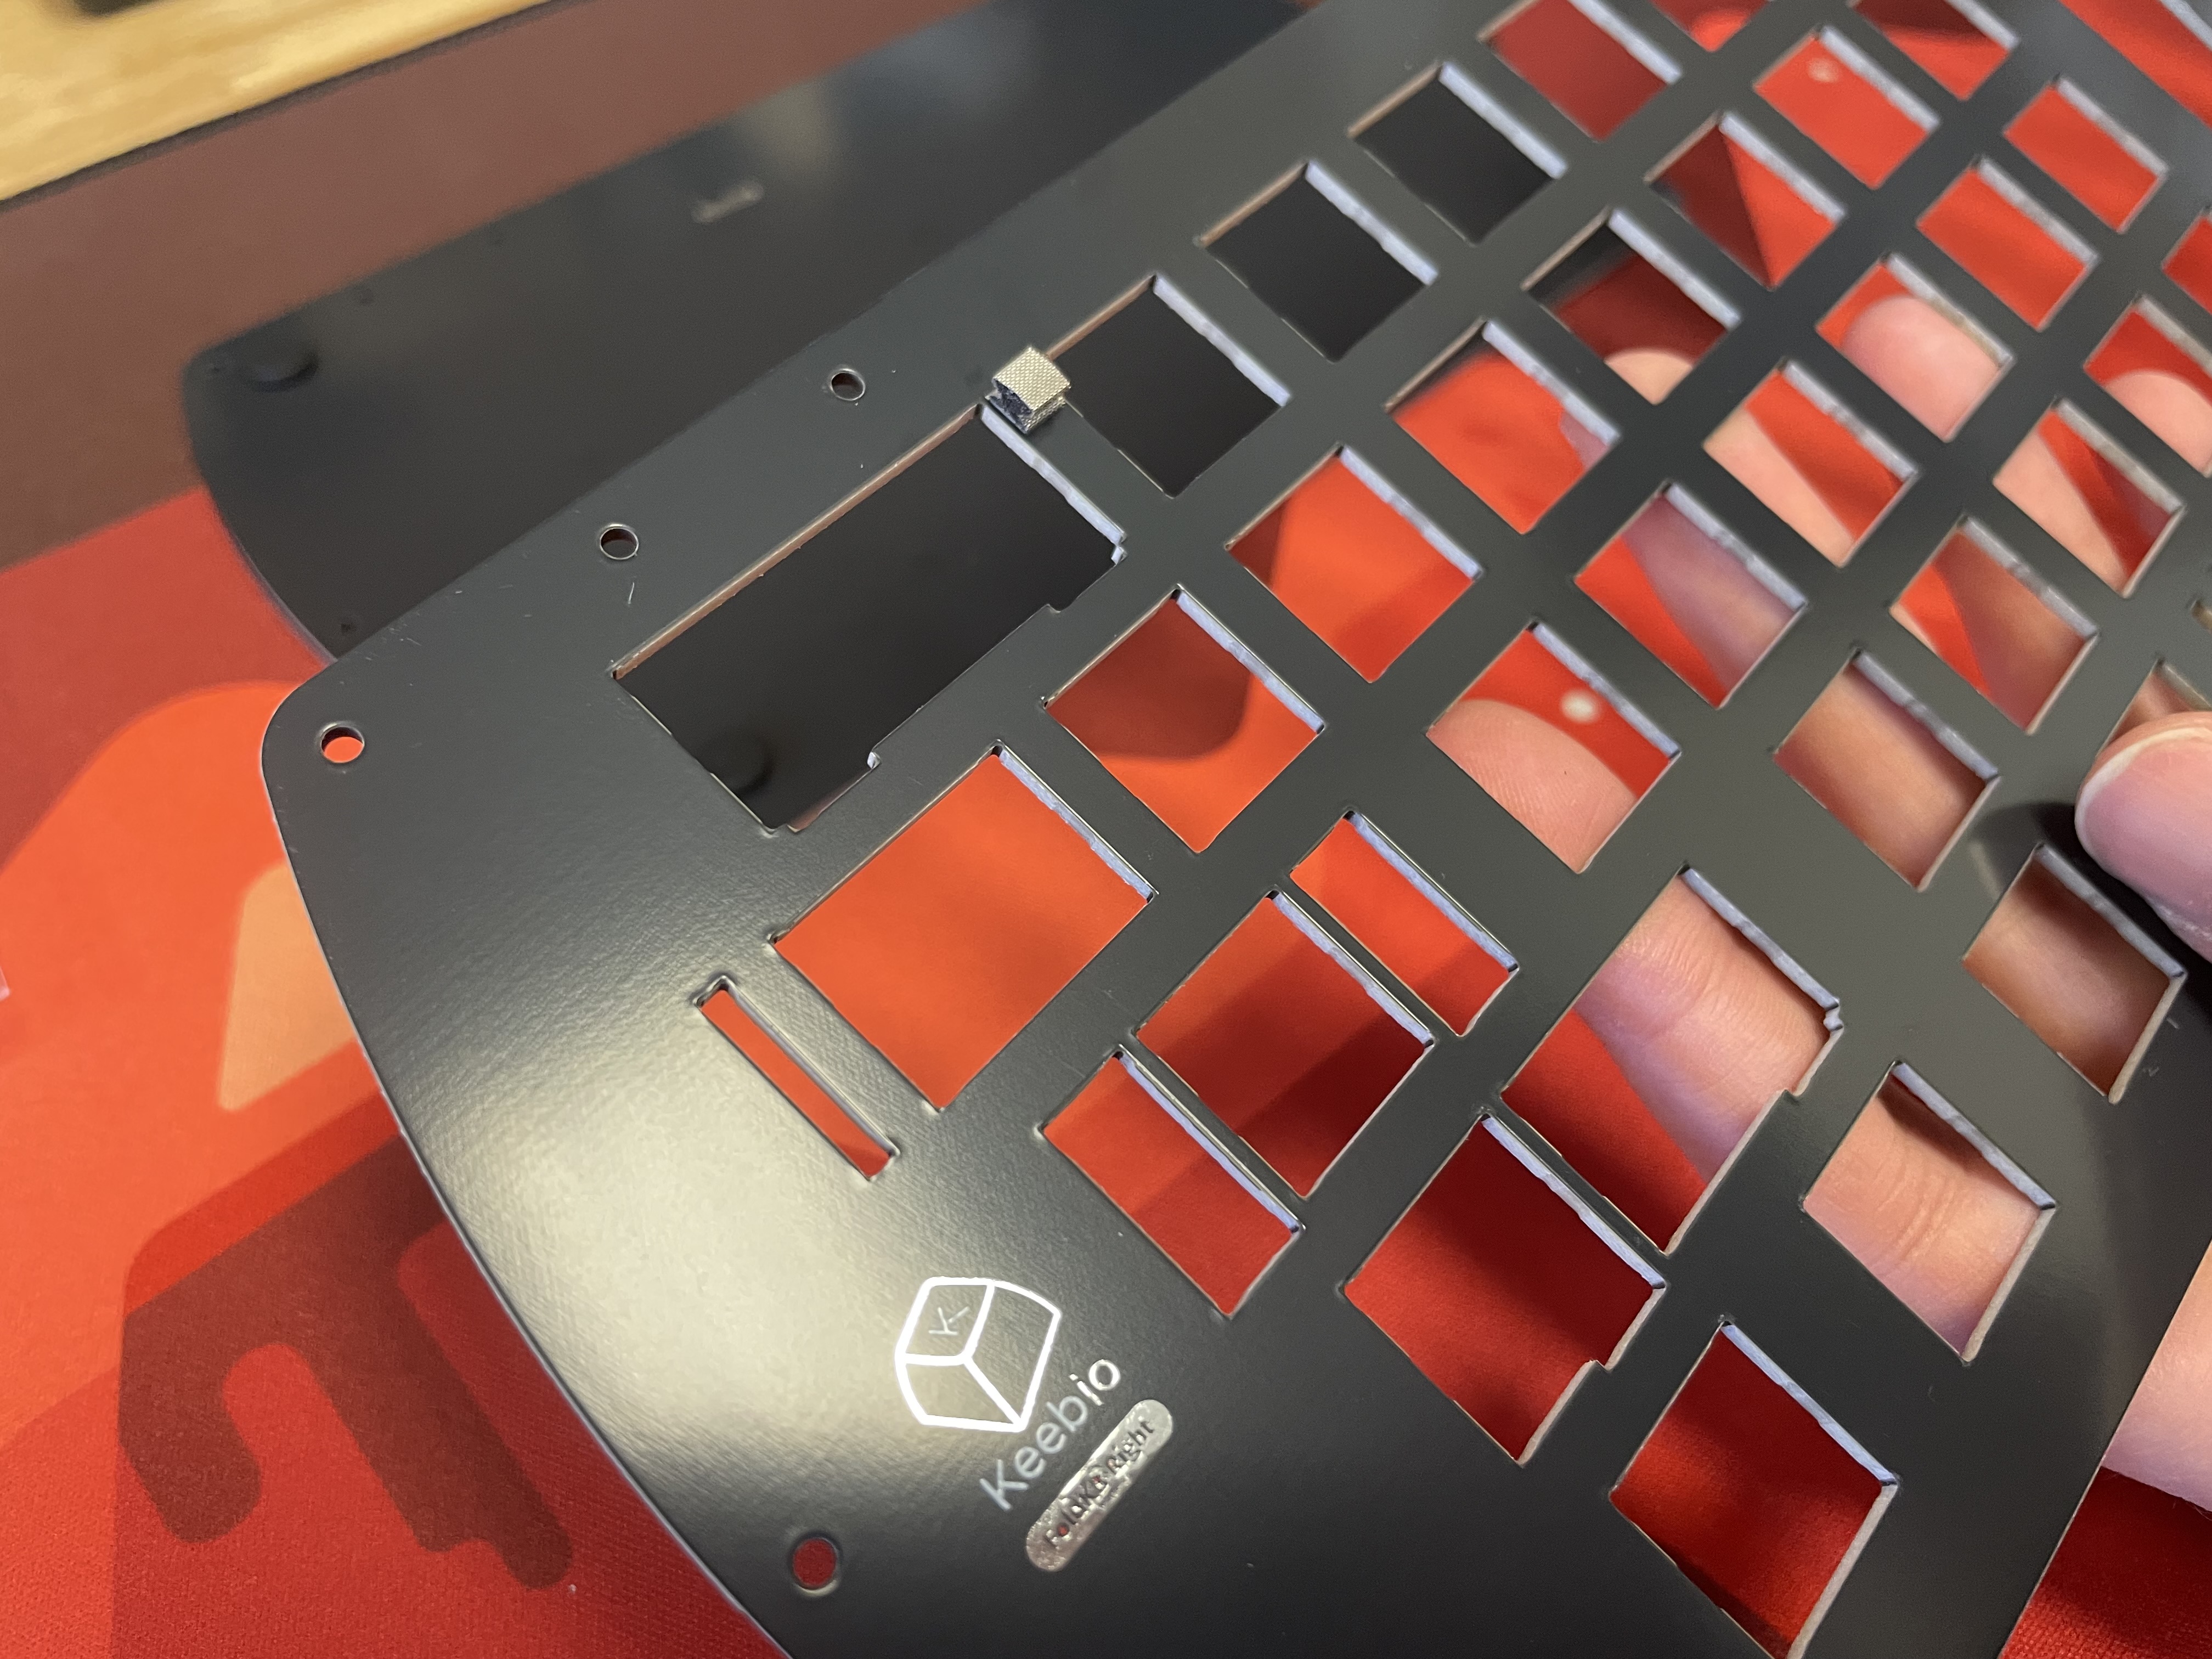
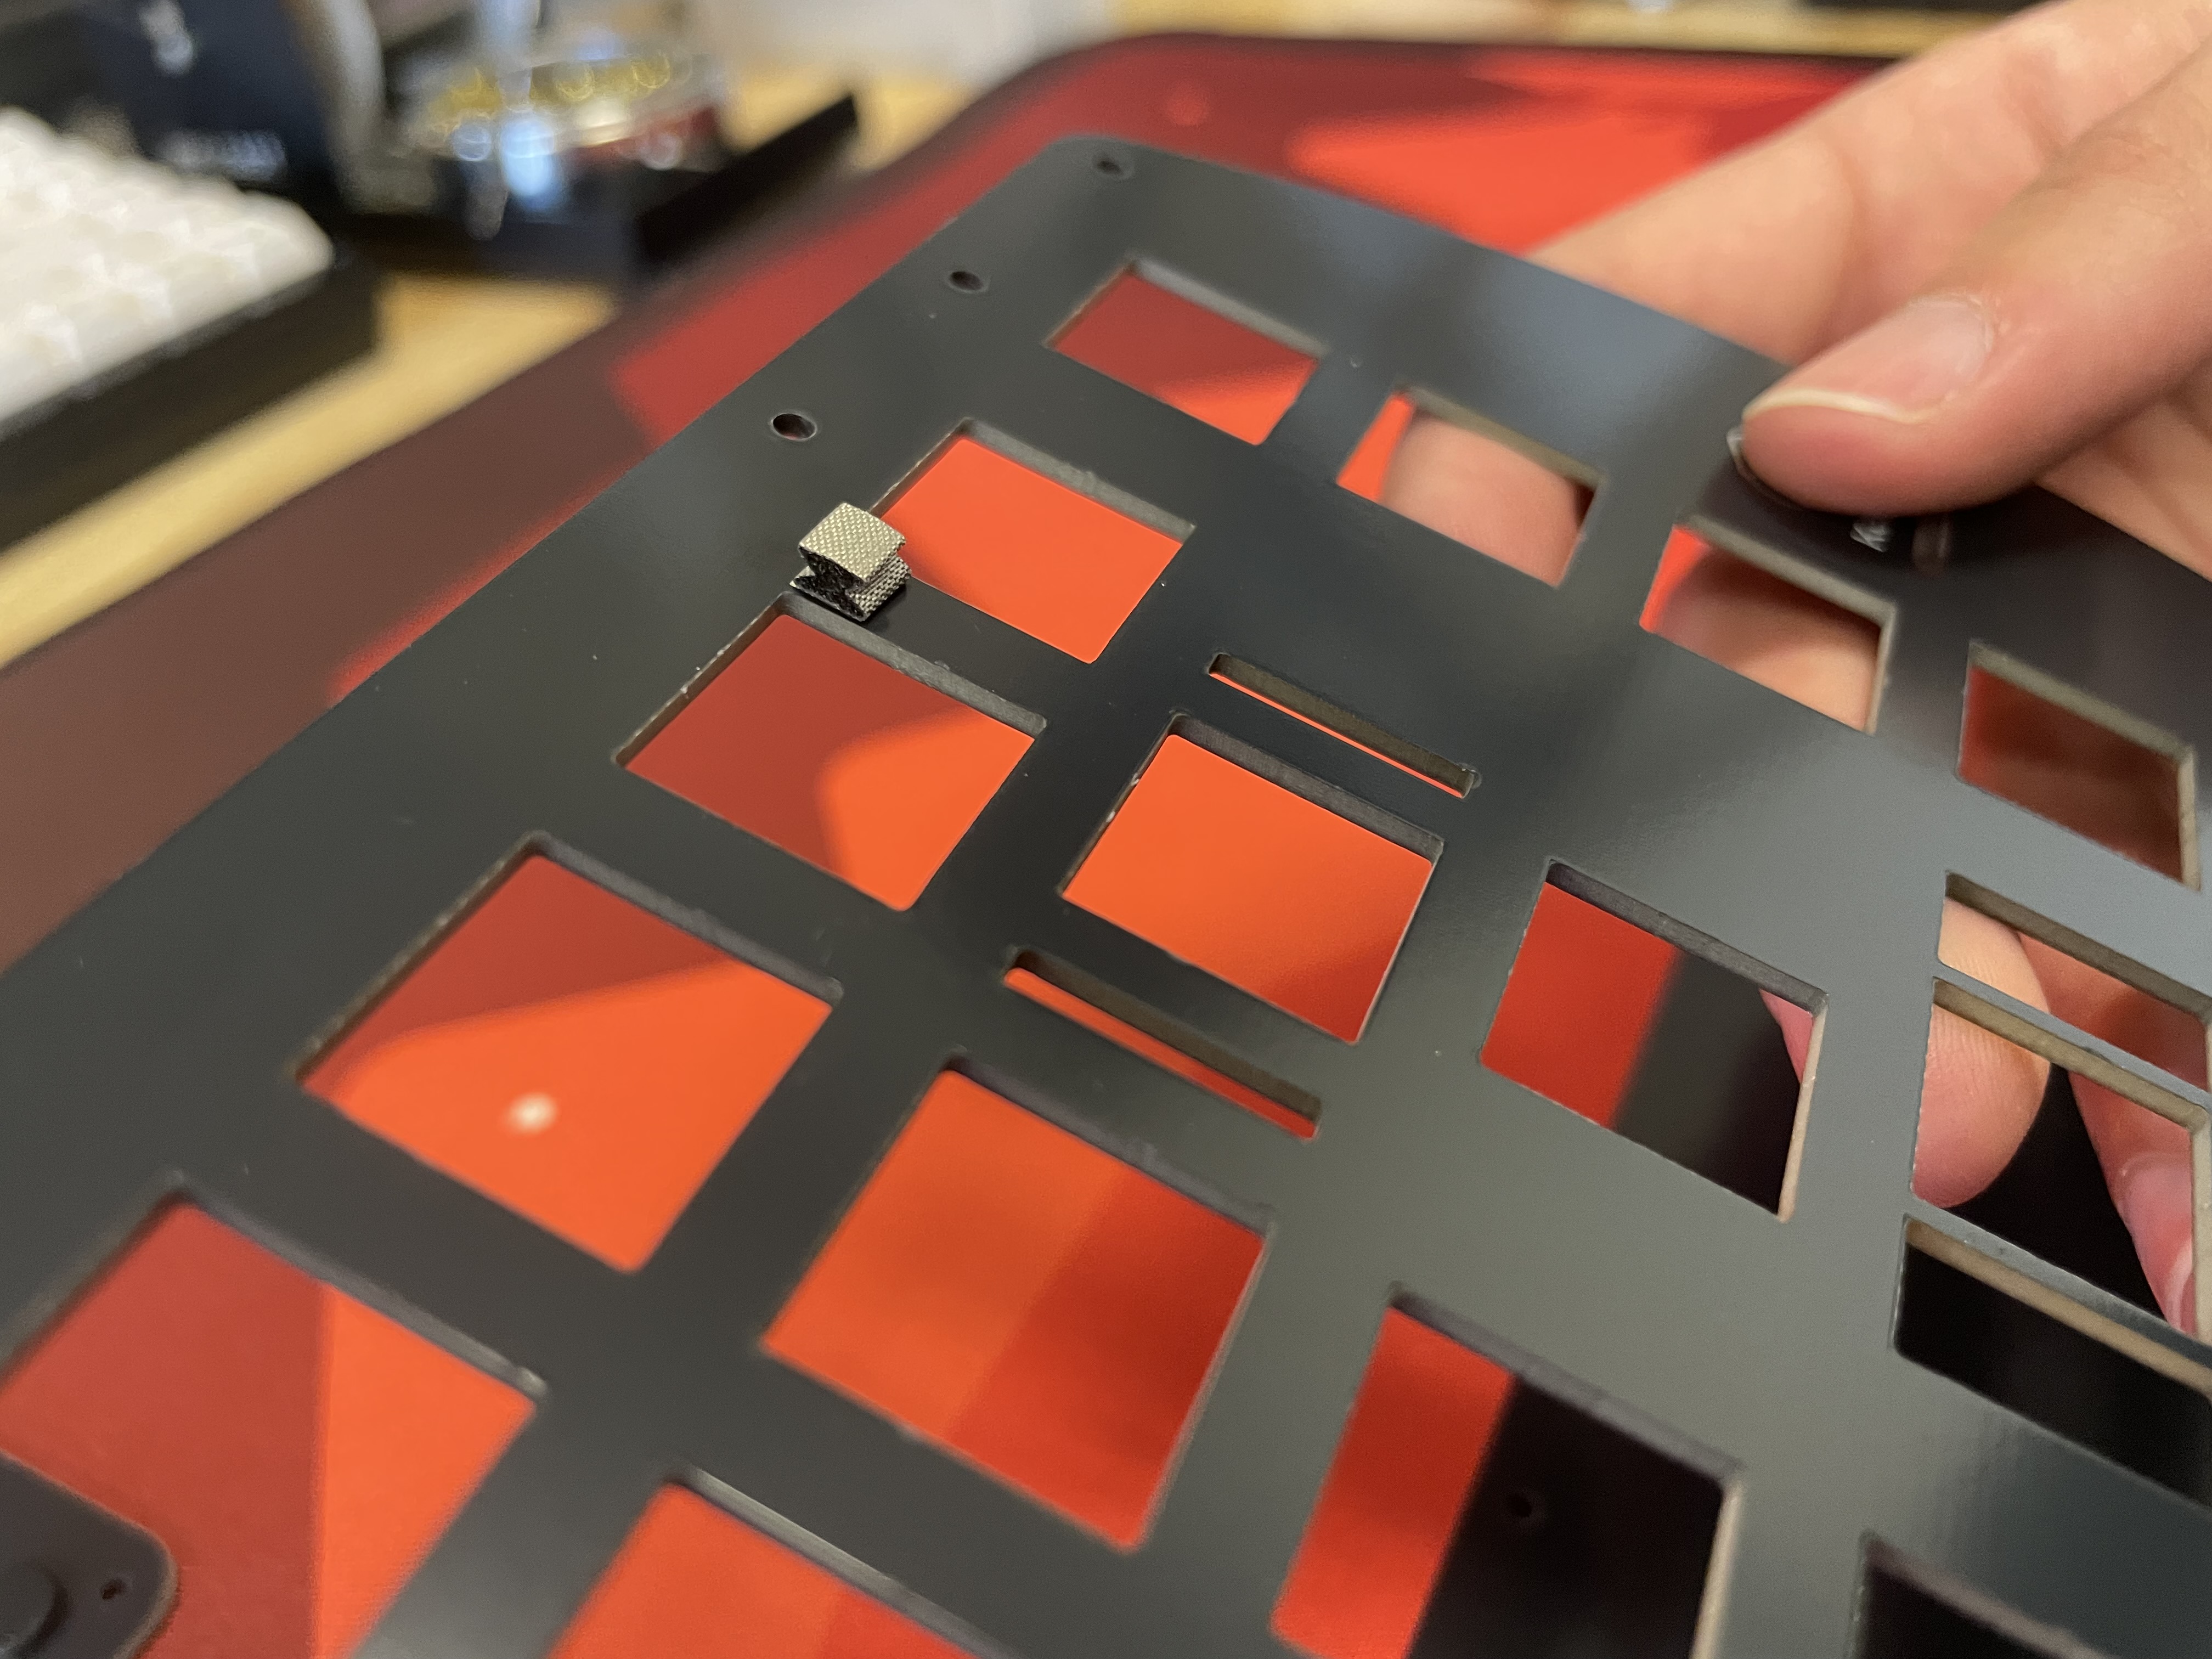
- Verify conductive ESD foam gaskets/pads did not fall off switch plates in transit
- Verify shroomies are pushed in all the way
These are the conductive ESD foam gaskets/pads that should be present on your plates:
Build Steps Summary
- Solder rotary encoder (optional)
- Add 2u stabilizers to PCB
- Add switches (Durock Shrimp Tactiles used in photos)
- Assemble!
- Screw standoffs into bottom plate
- Add FLAHNS
- Attach bottom plate using screws
- Reprogramming Board Note
- Rejoice!
Solder Rotary Encoder
If you want a layout without the rotary encoder, jump to Add 2u stabilizers to PCB
Install the encoder onto the PCB and solder the 3 pins at the top side of the encoder and the 2 pins at the bottom side.
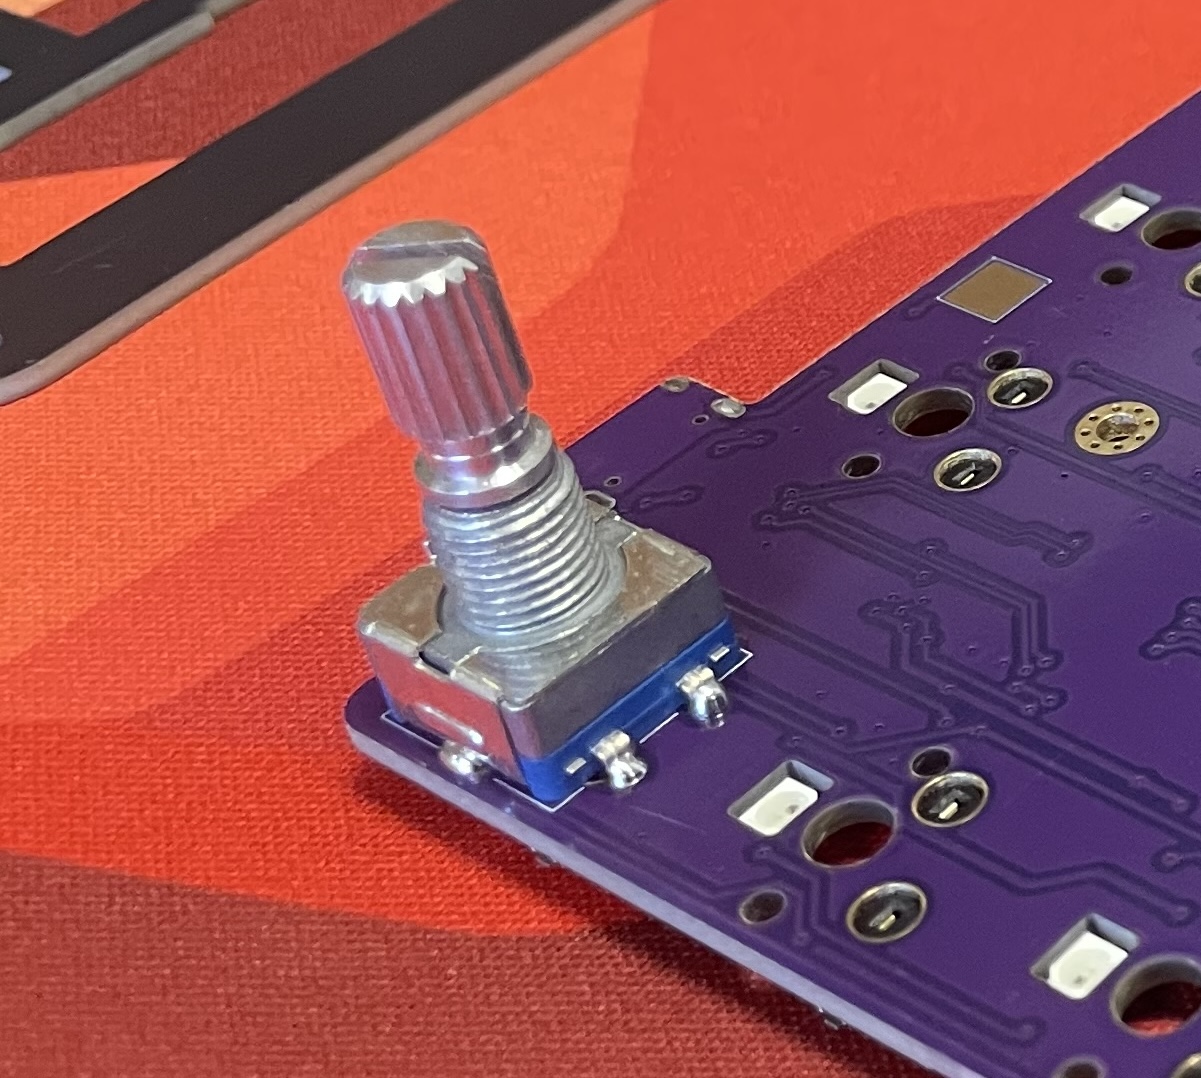
The 2 side legs do not need to be soldered to the PCB.
Add 2u Stabilizers to PCB
Add the 2u stabilizers into the PCB. The stab wire will be on the bottom side of the switch everywhere except for the bottom row. On the bottom row, the stab wire will be above the switch. Do this before installing the switch plate and switches, as stabilizers can not be removed without needing to remove all the switches.
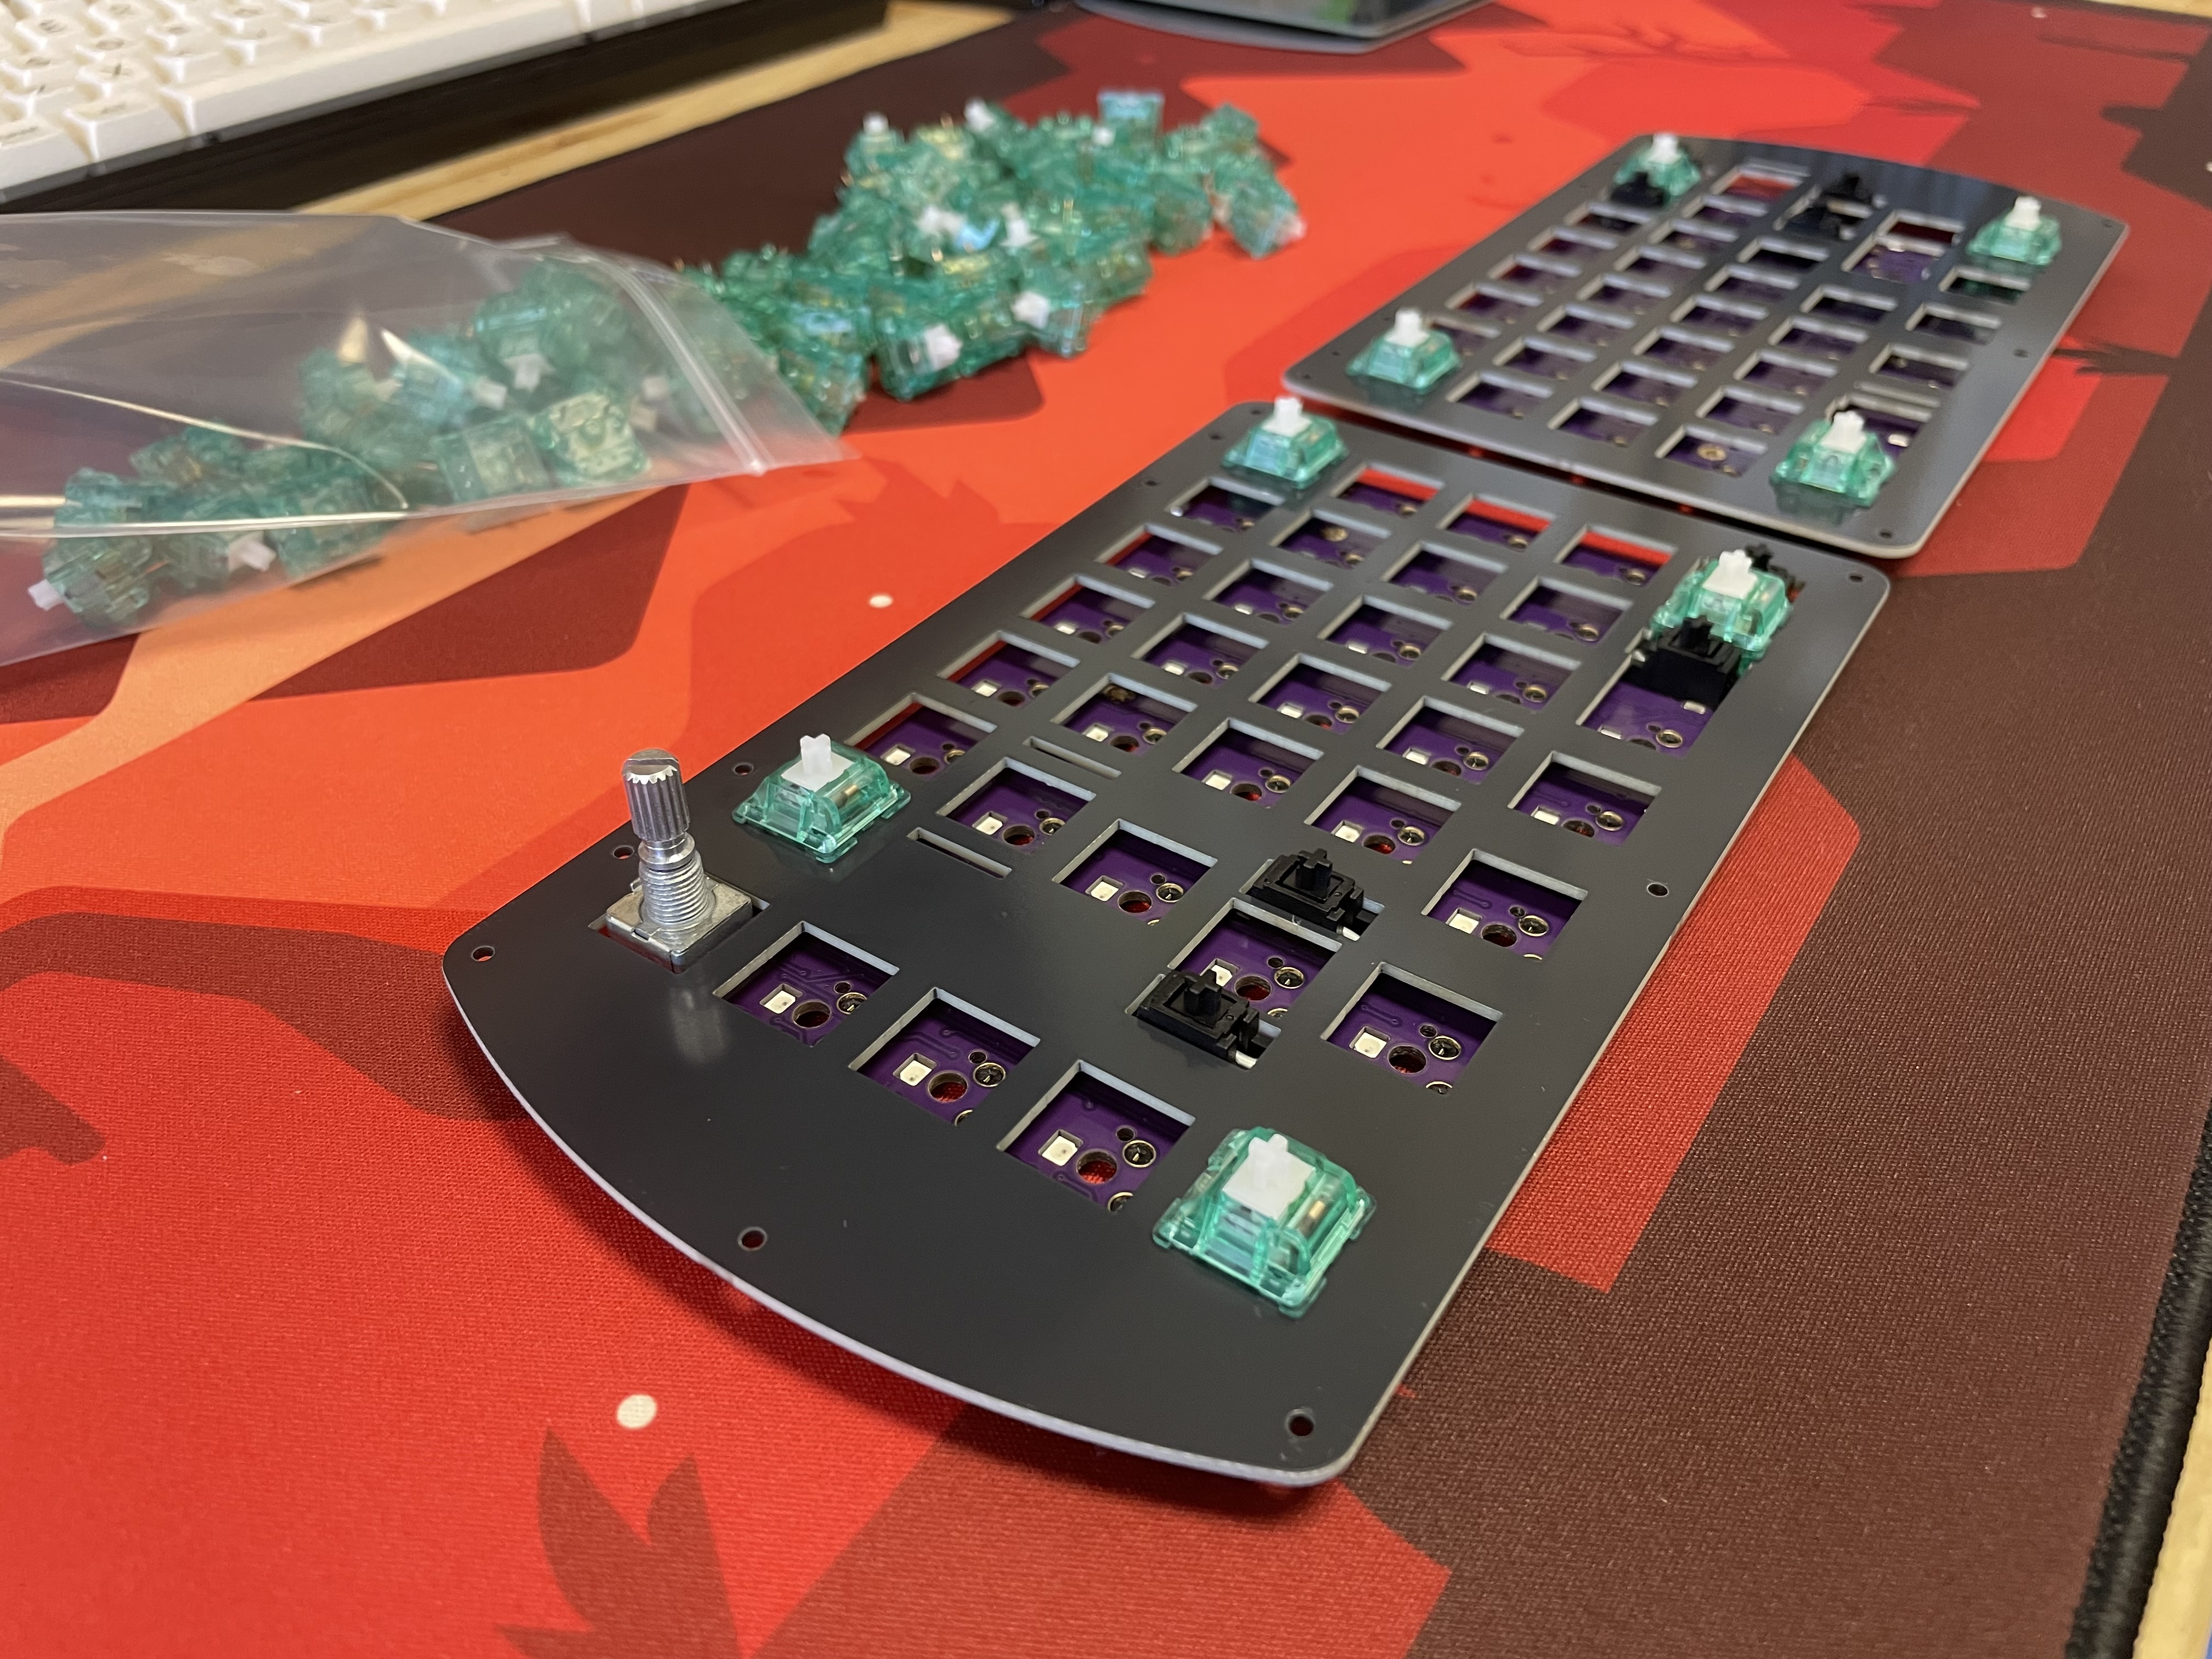
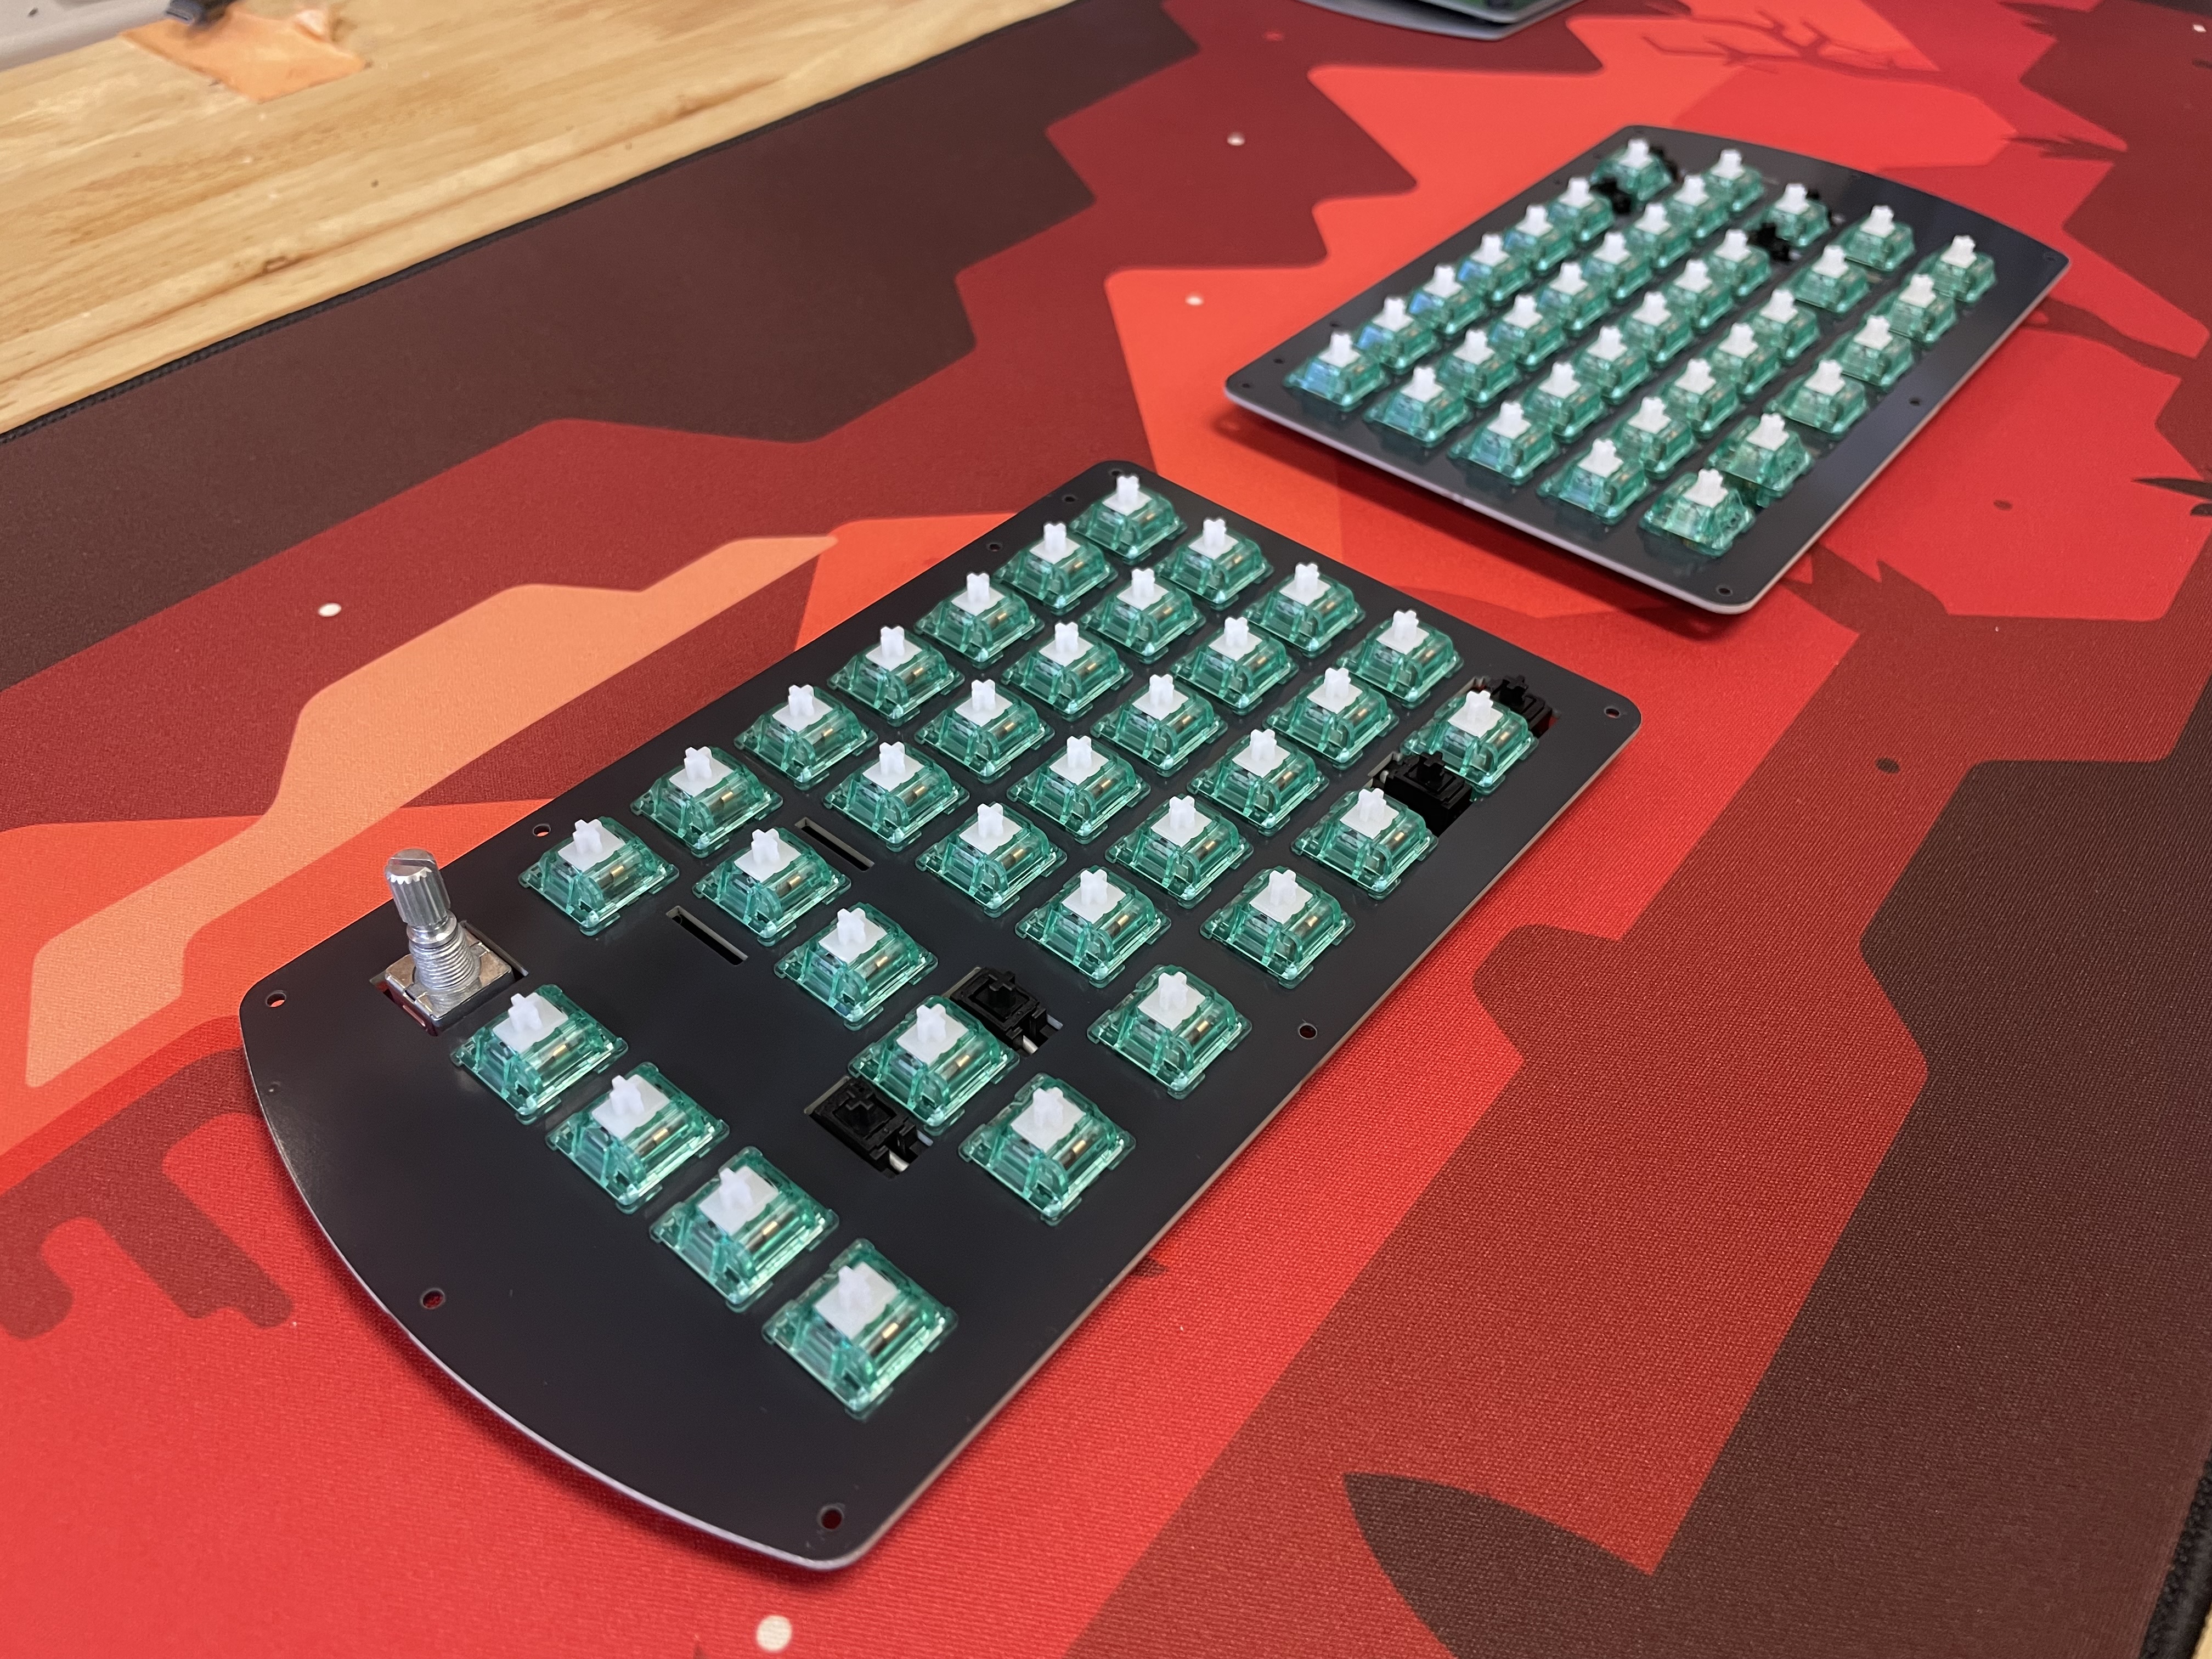
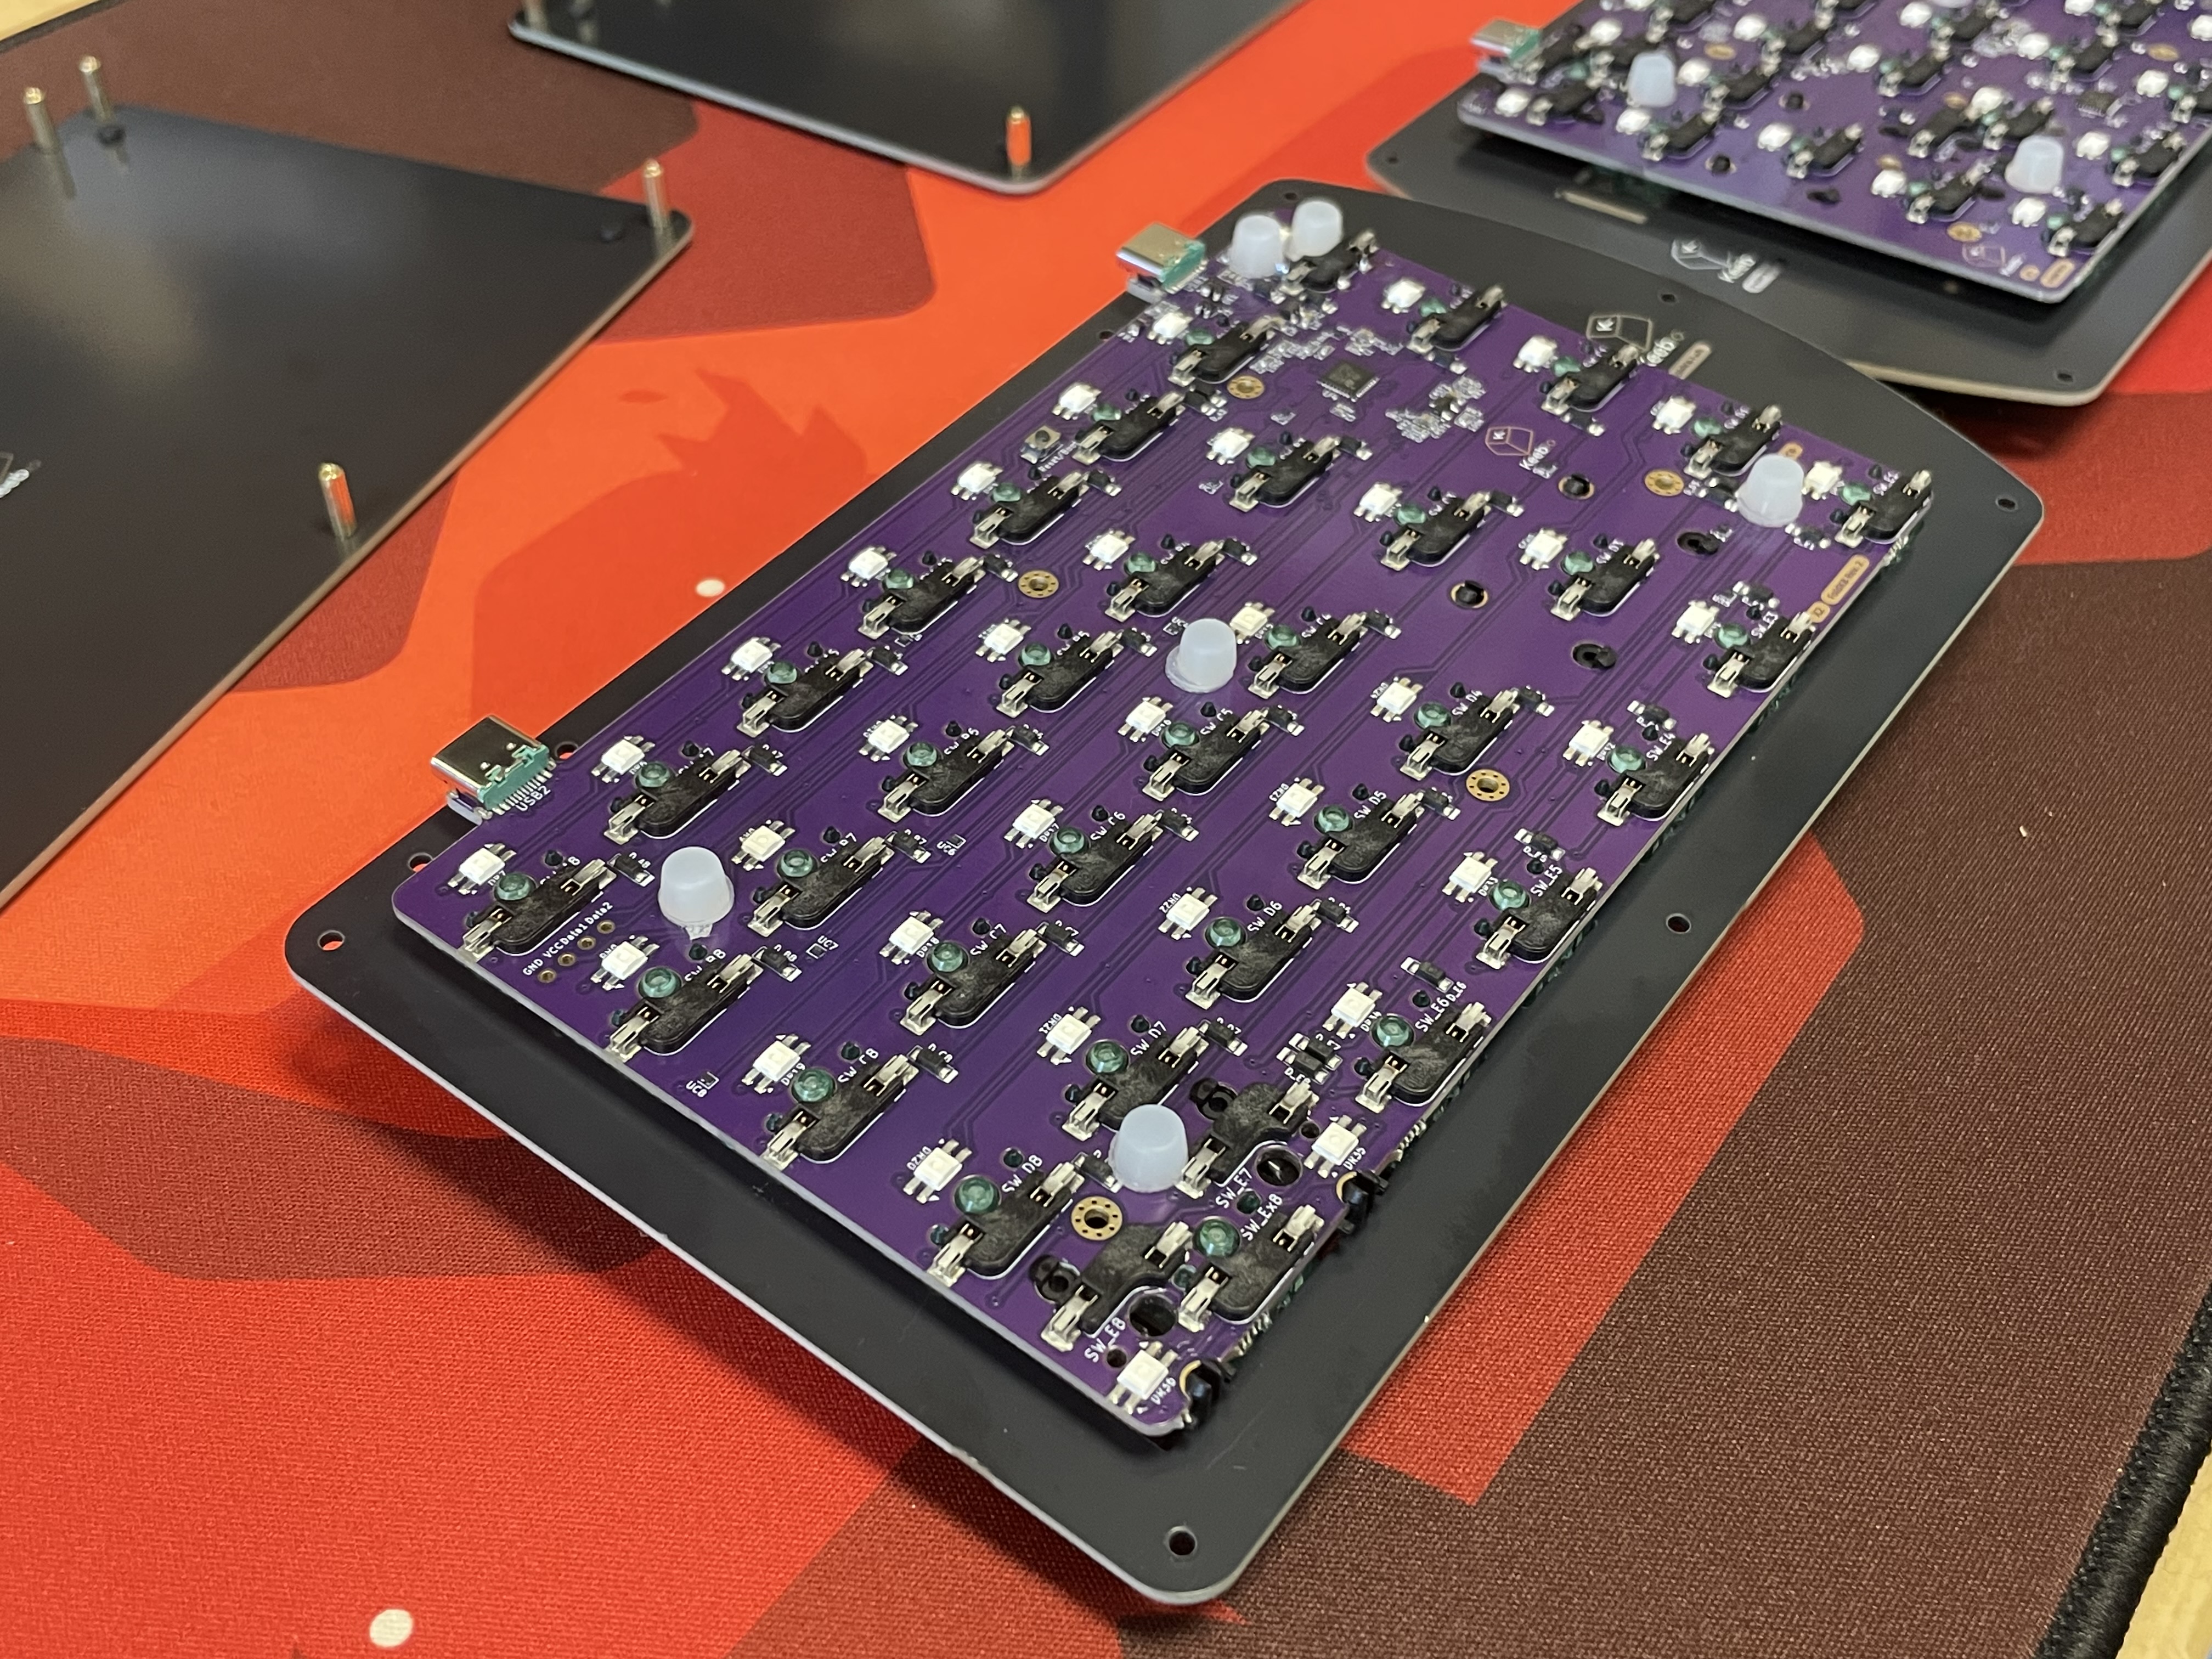
Add switches
Get hype! Now it's time to put your switches into the switch plate.
We recommend you add switches to the corners first before installing the rest of them:
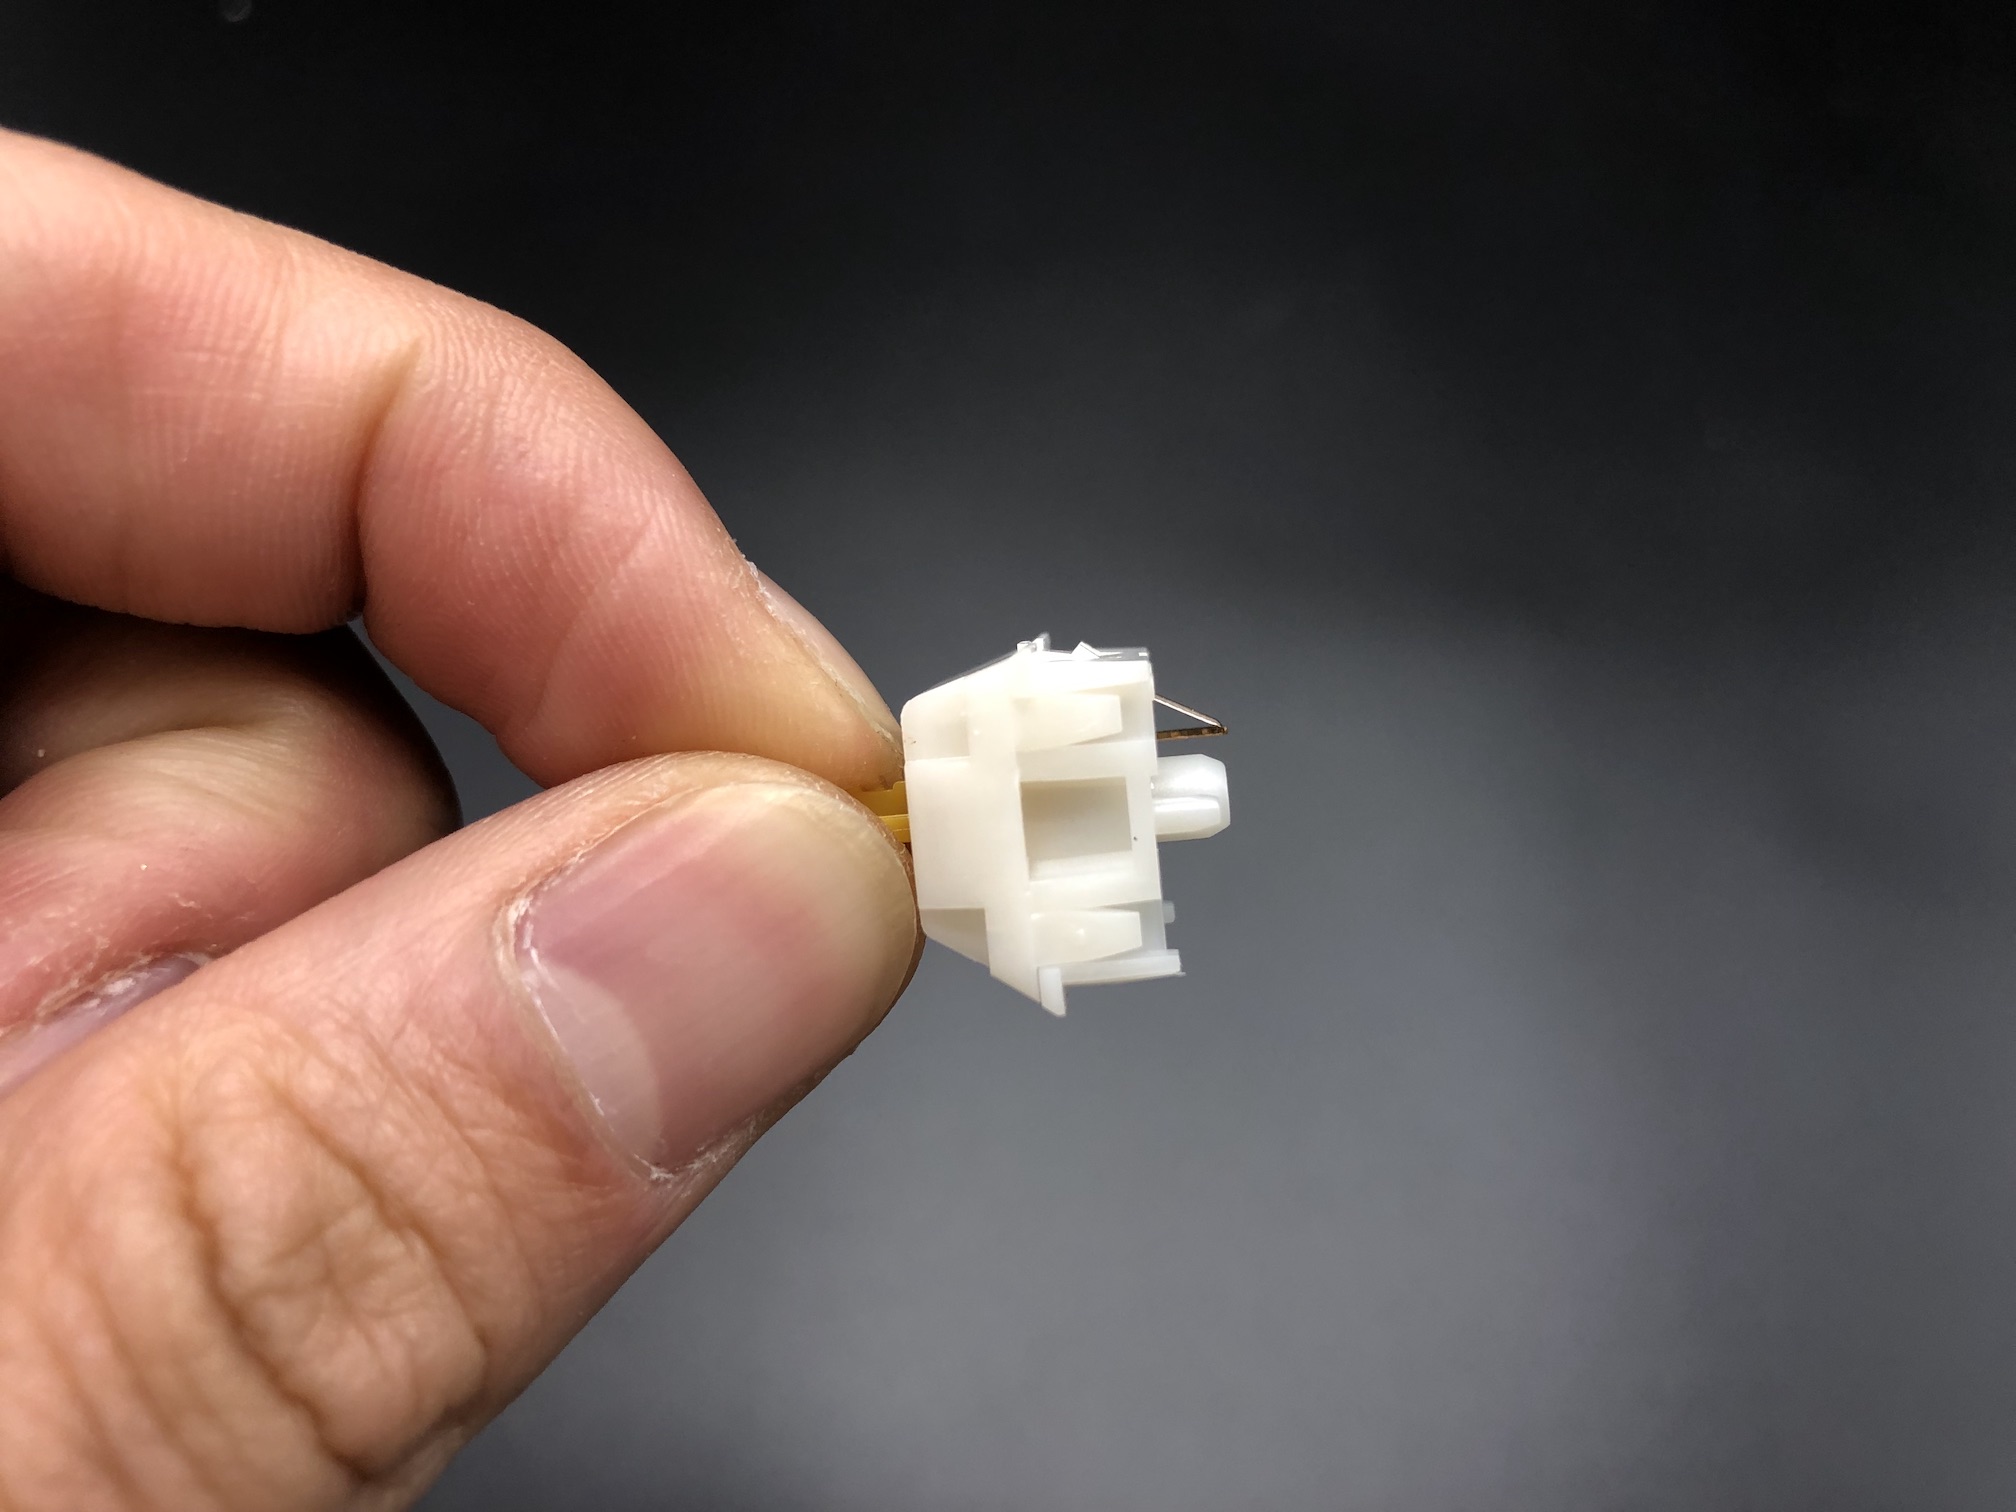
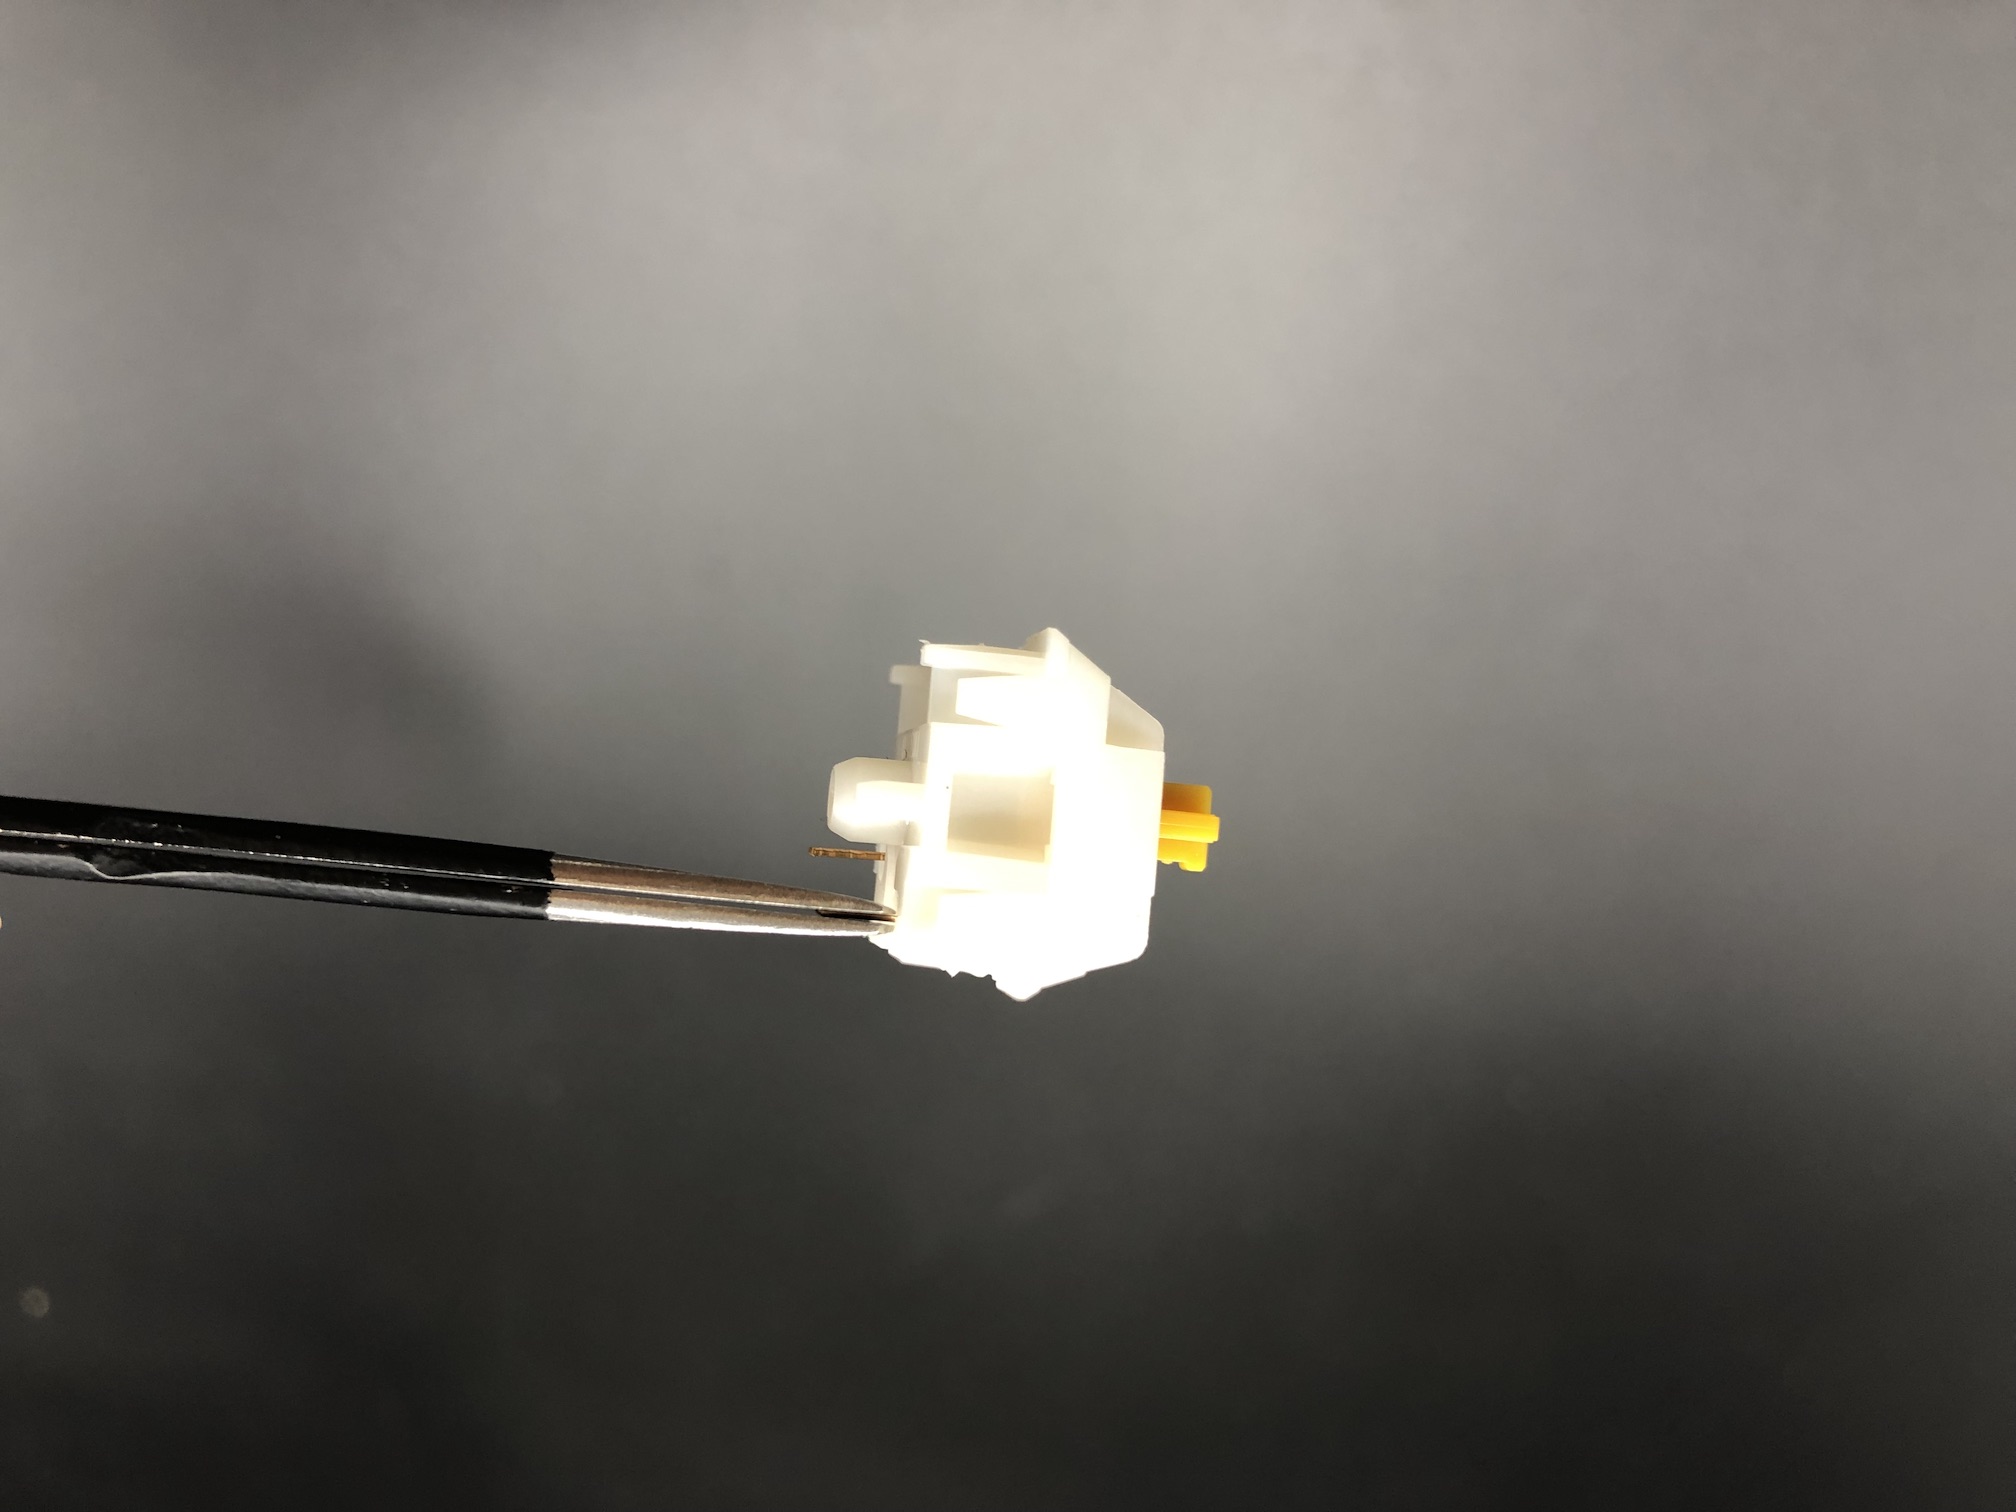
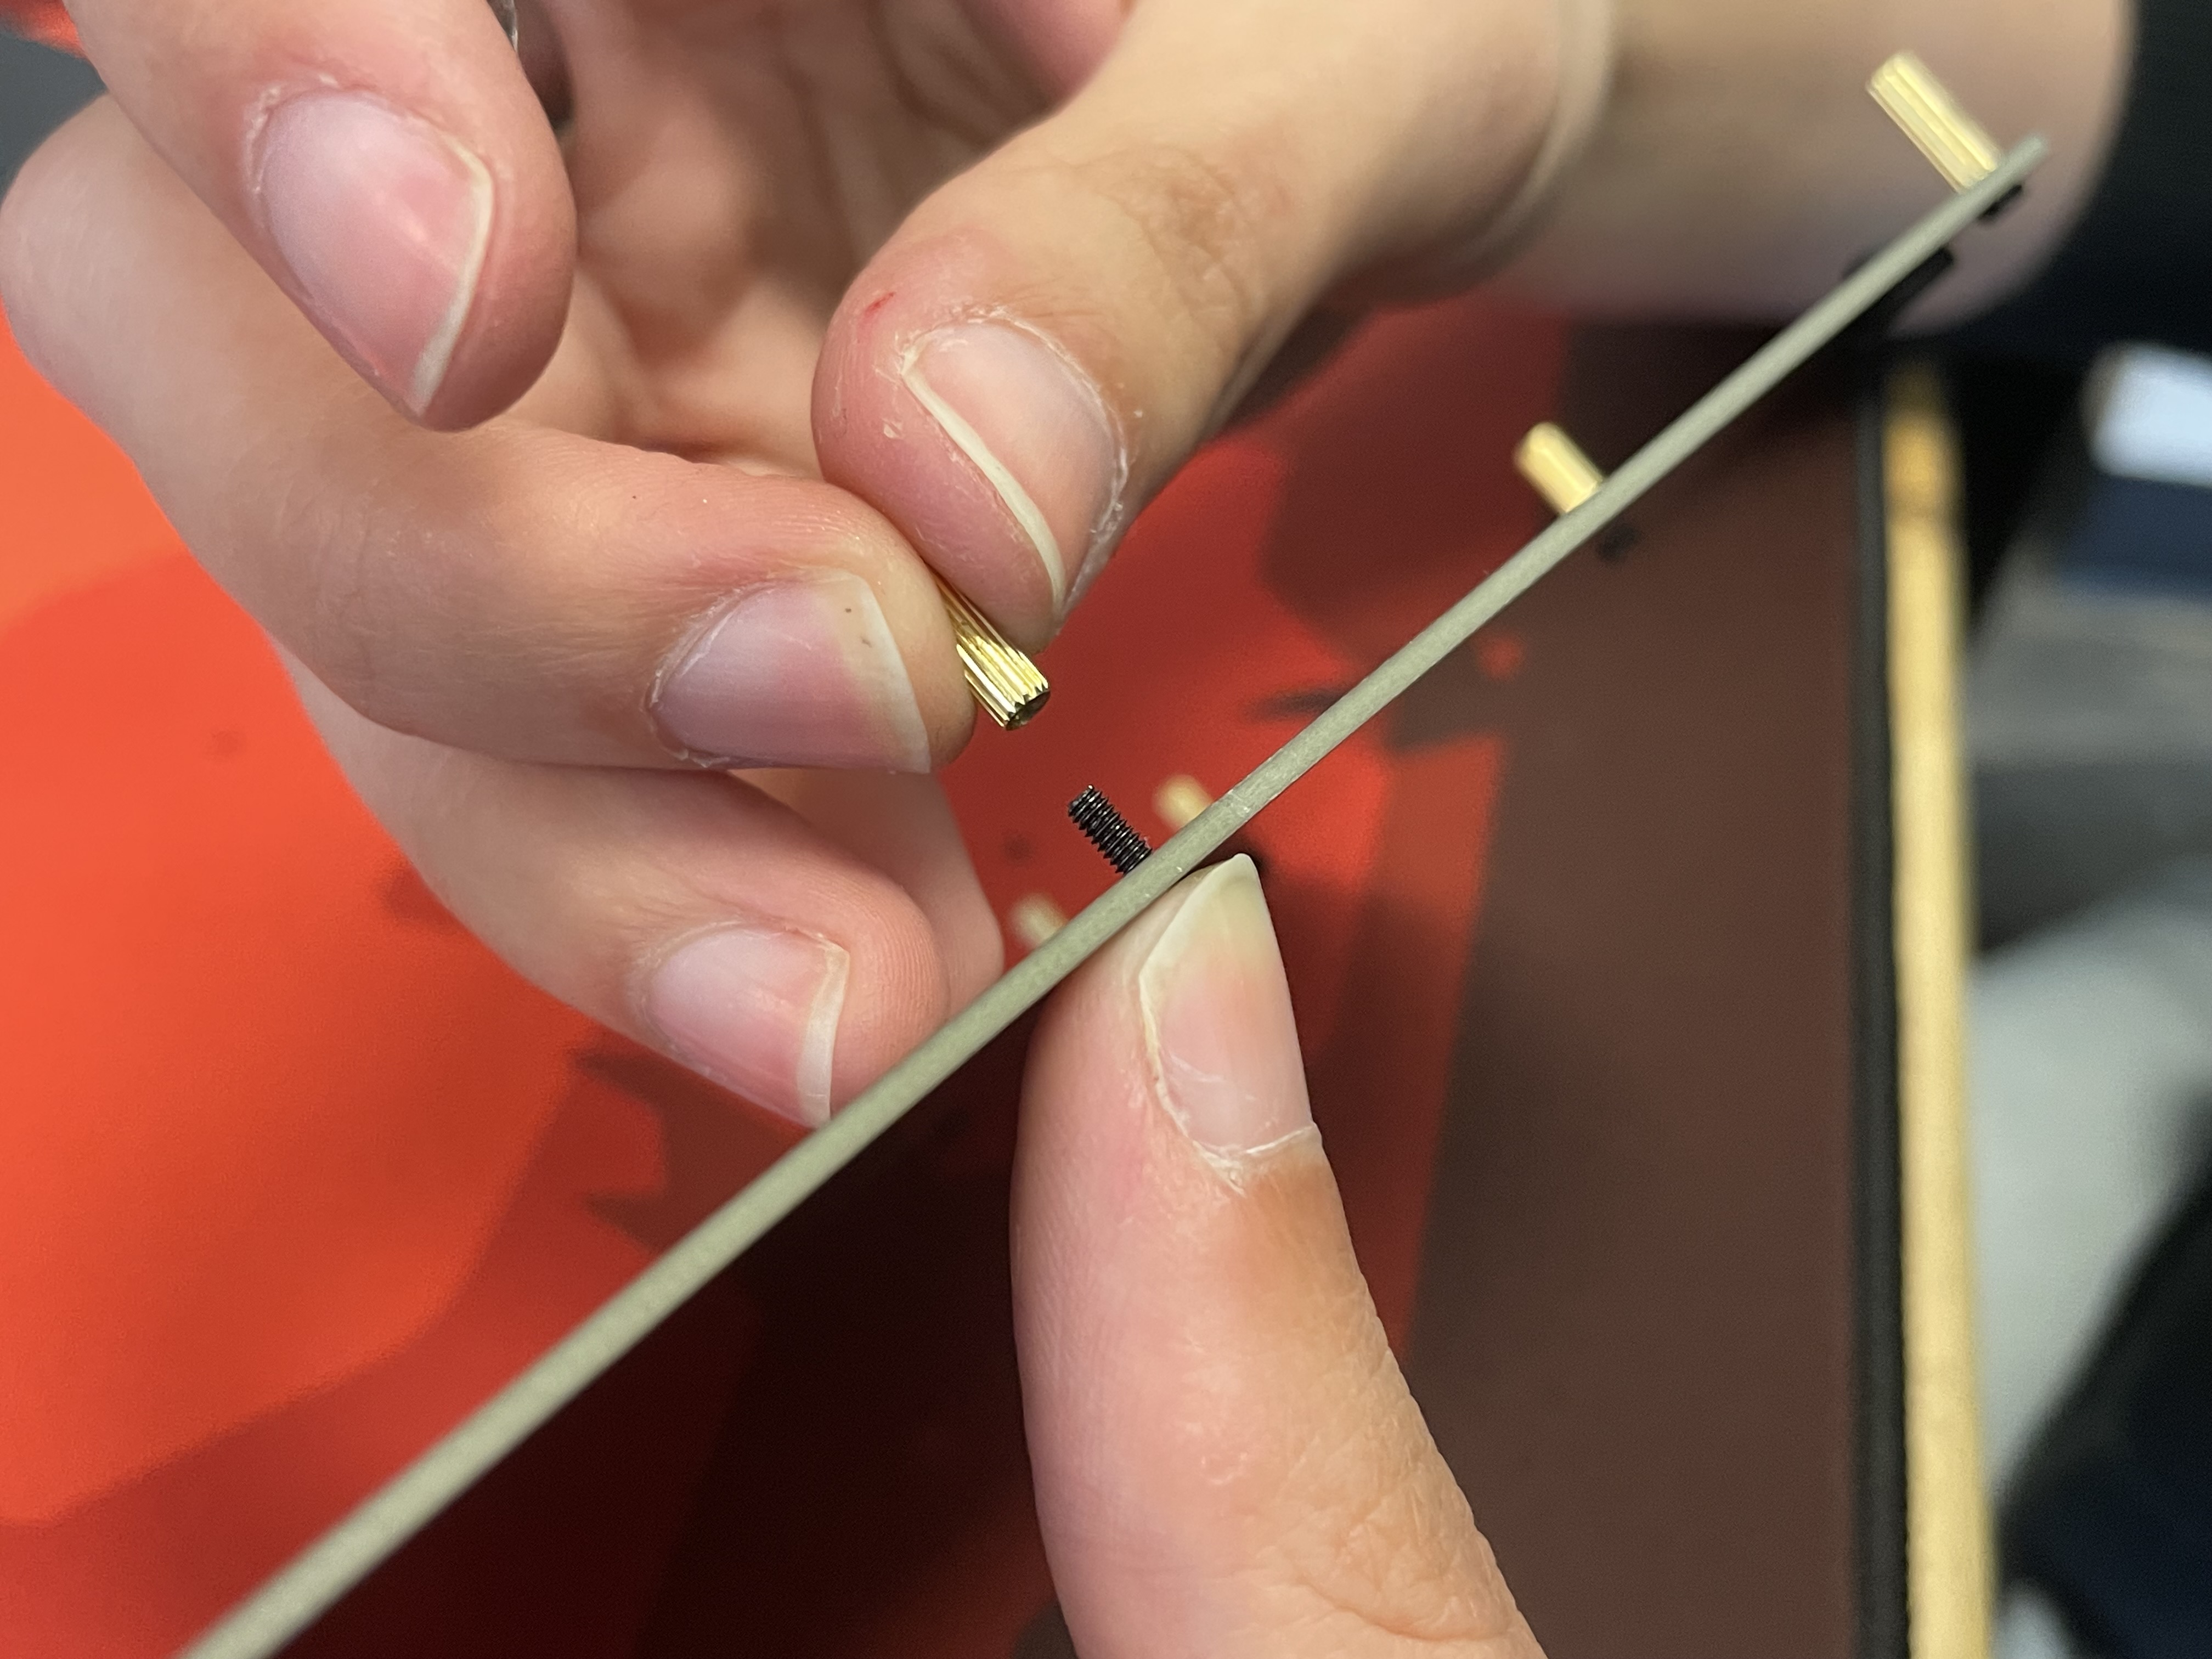
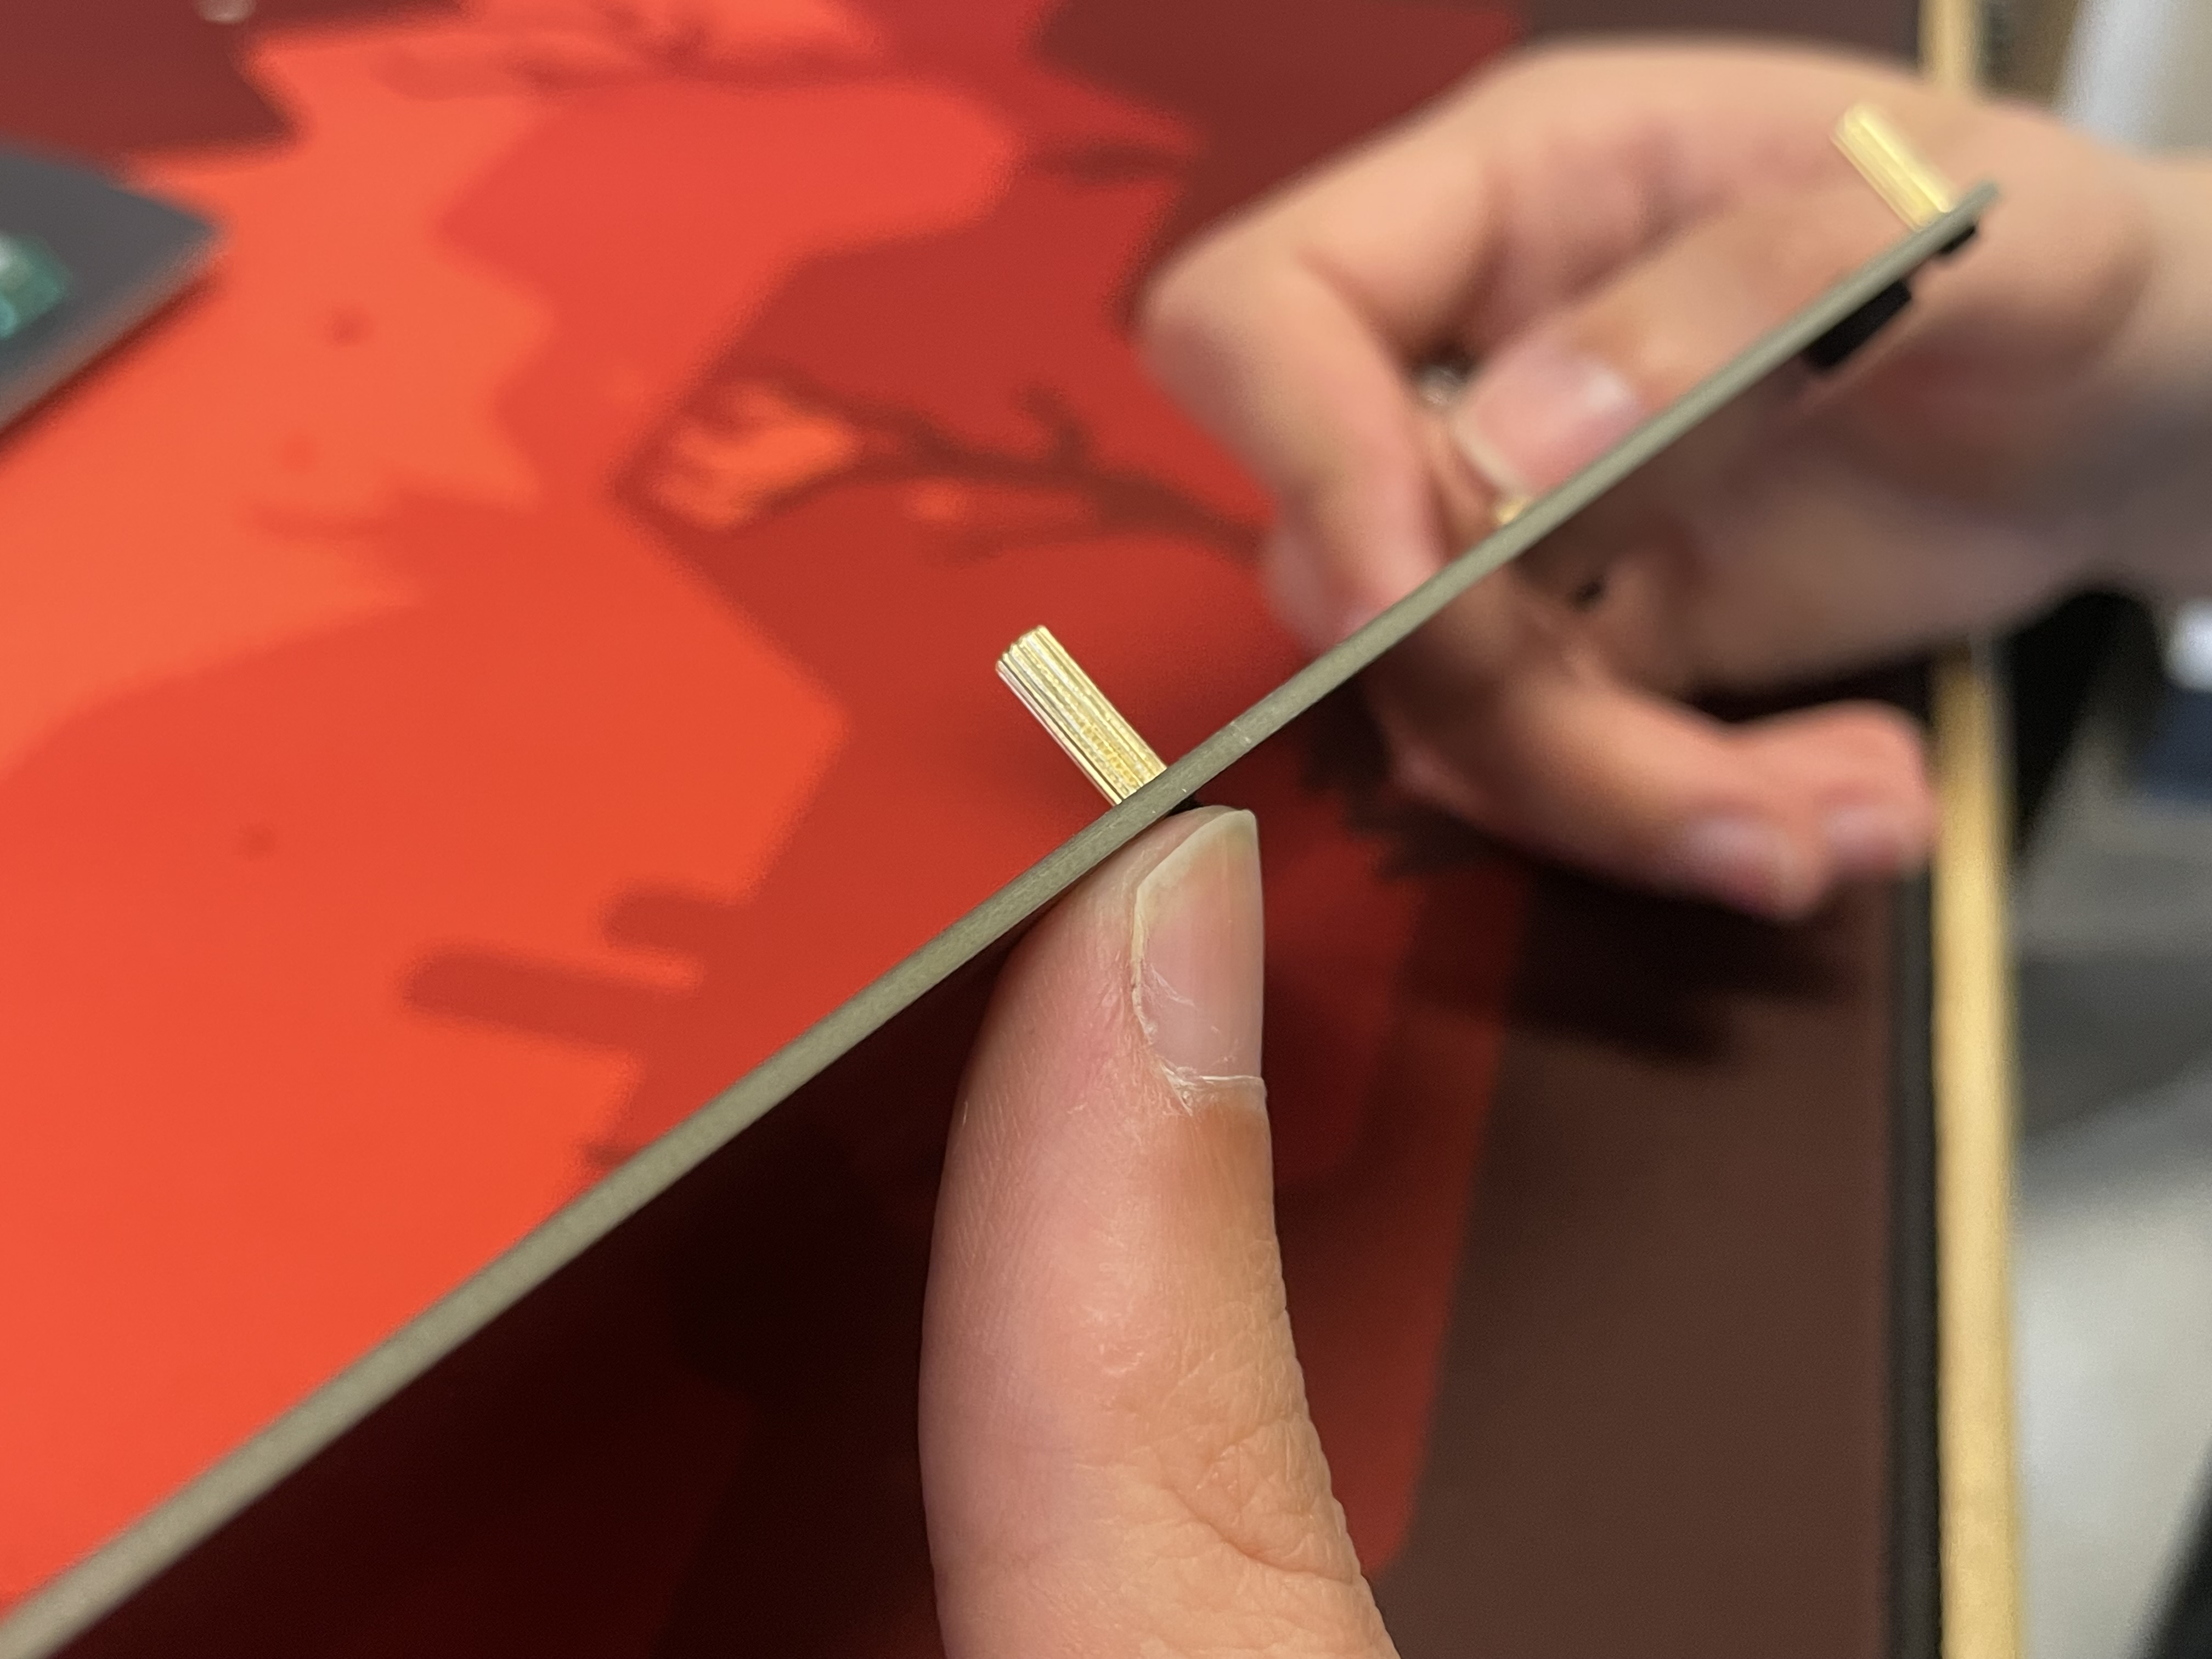
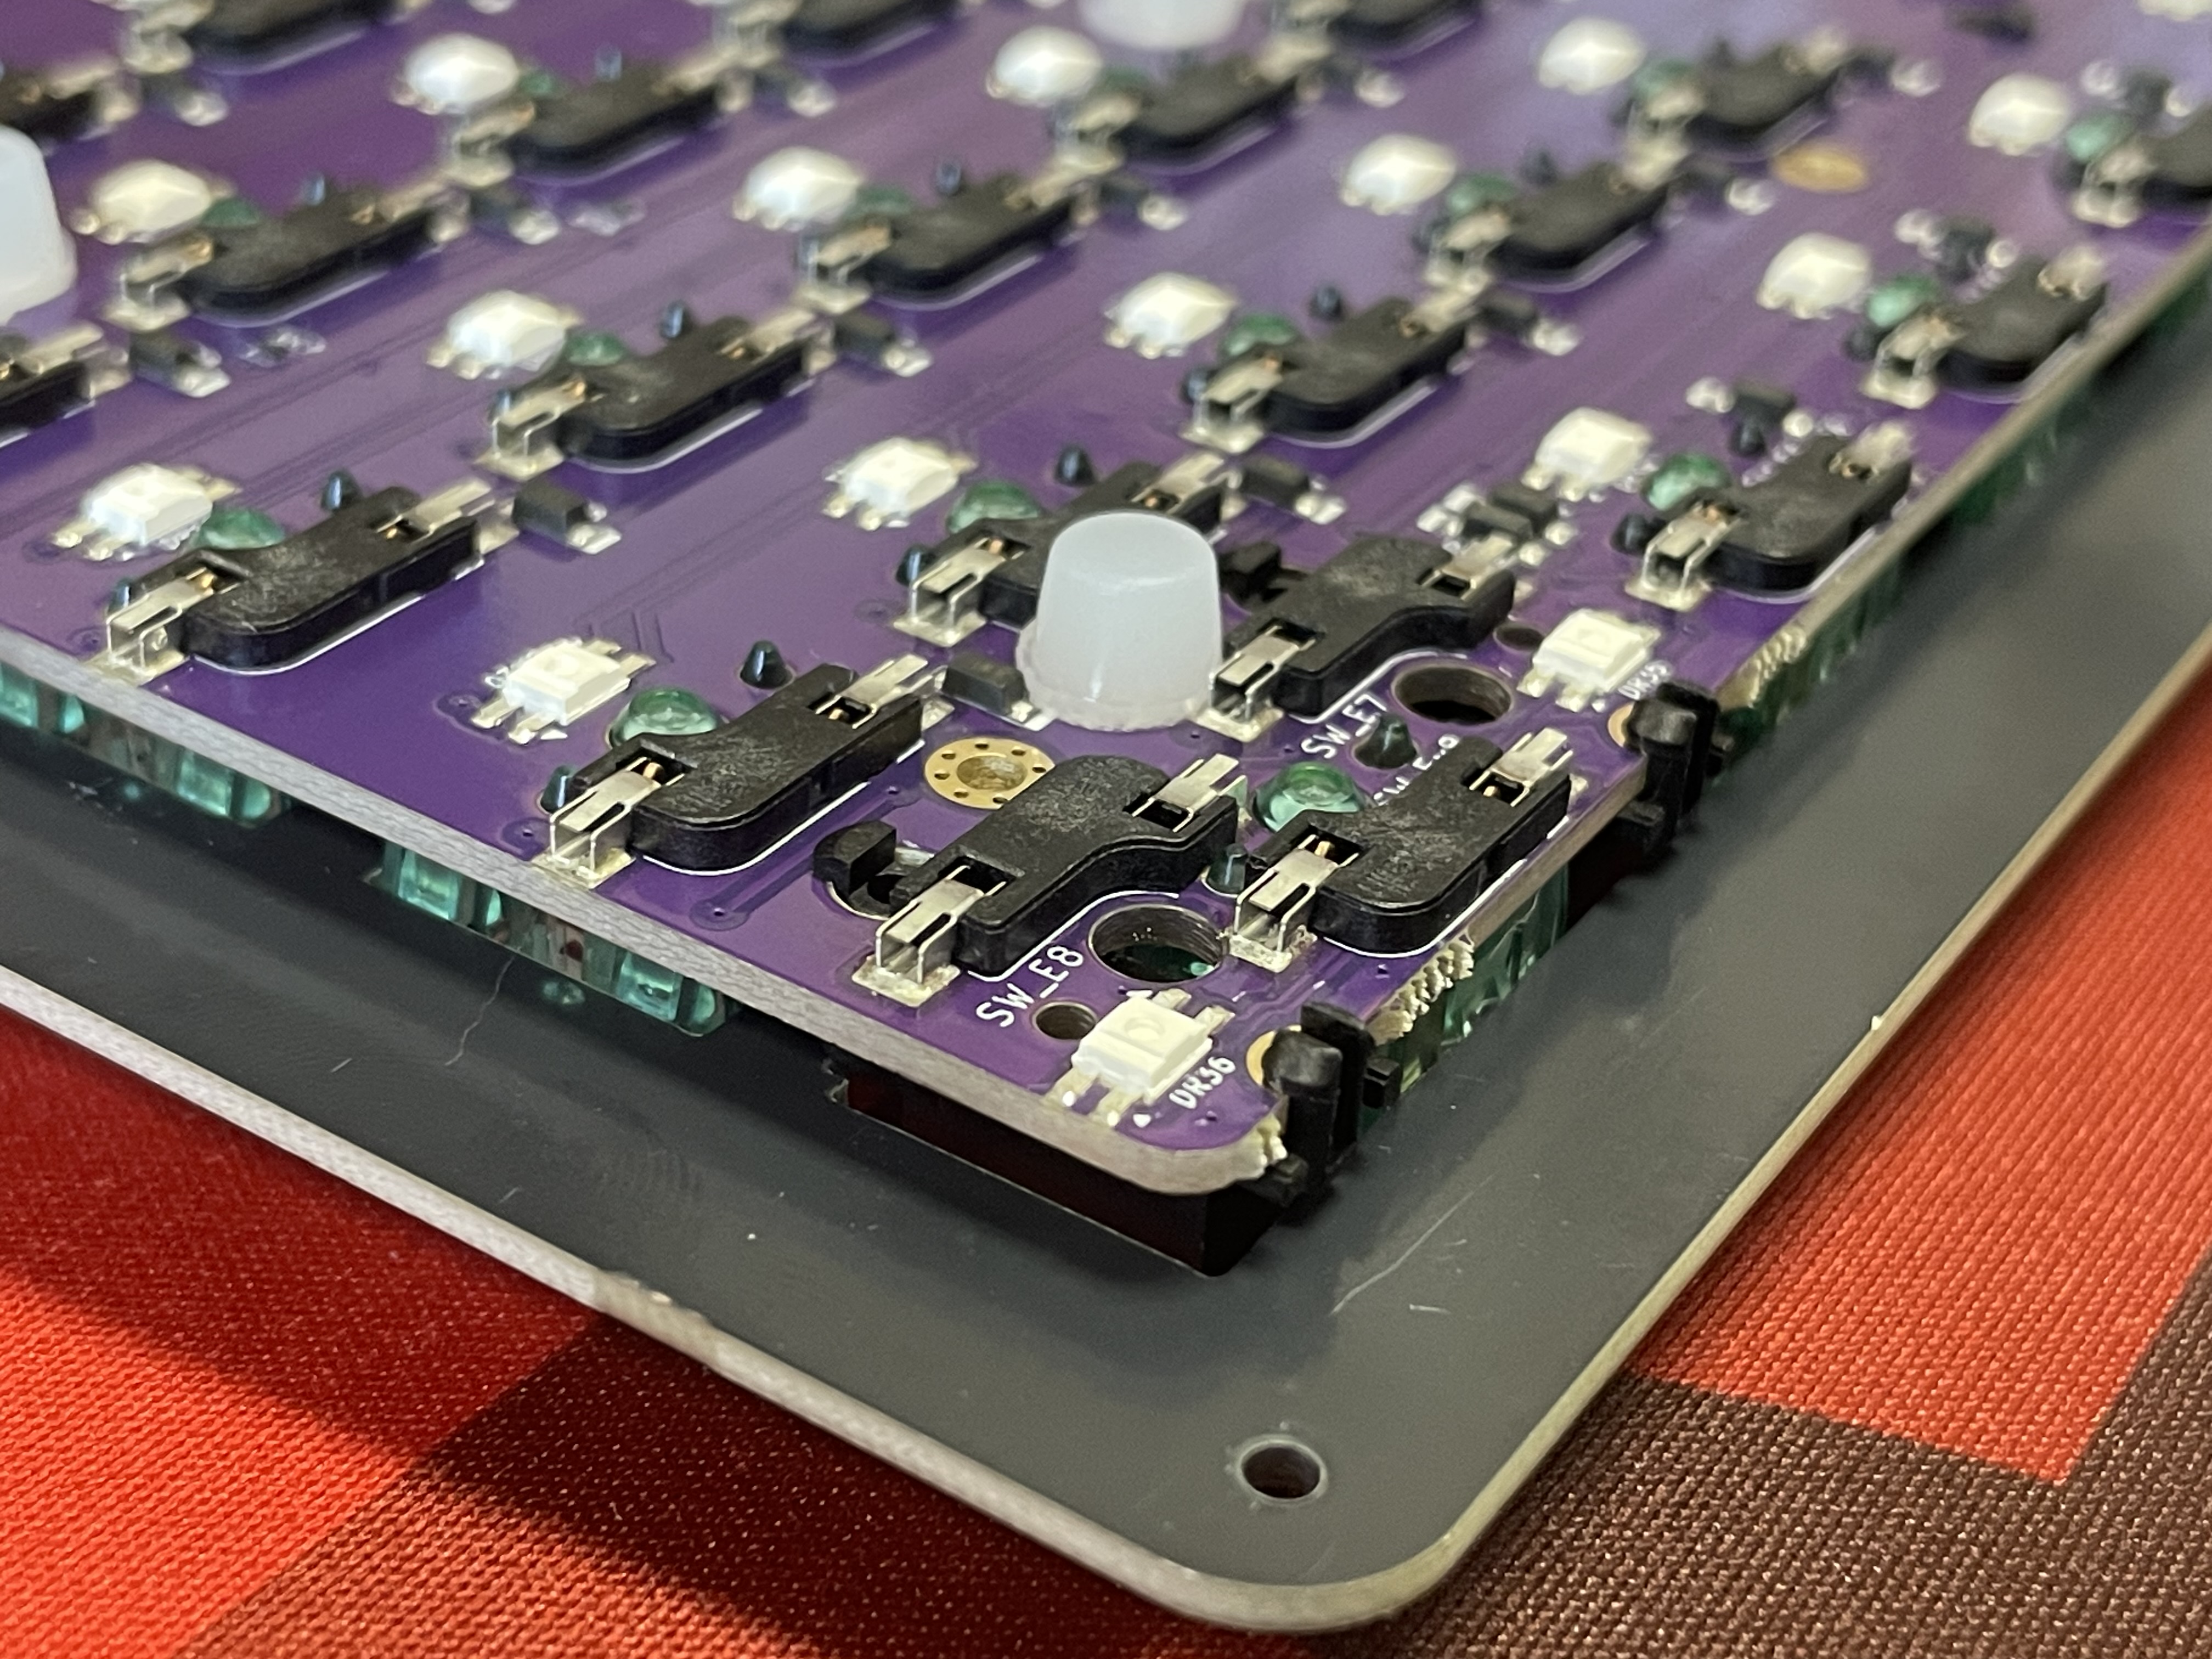
Make sure all of the switch pins are straight, or else they will not fit into the hotswap sockets properly and will bend the switch pins and/or damage the hotswap socket and PCB.
If you encounter a bent switch pin like below, bend it back with your fingers or a tweezer.
After you've inserted those first few switches, add the rest of them:
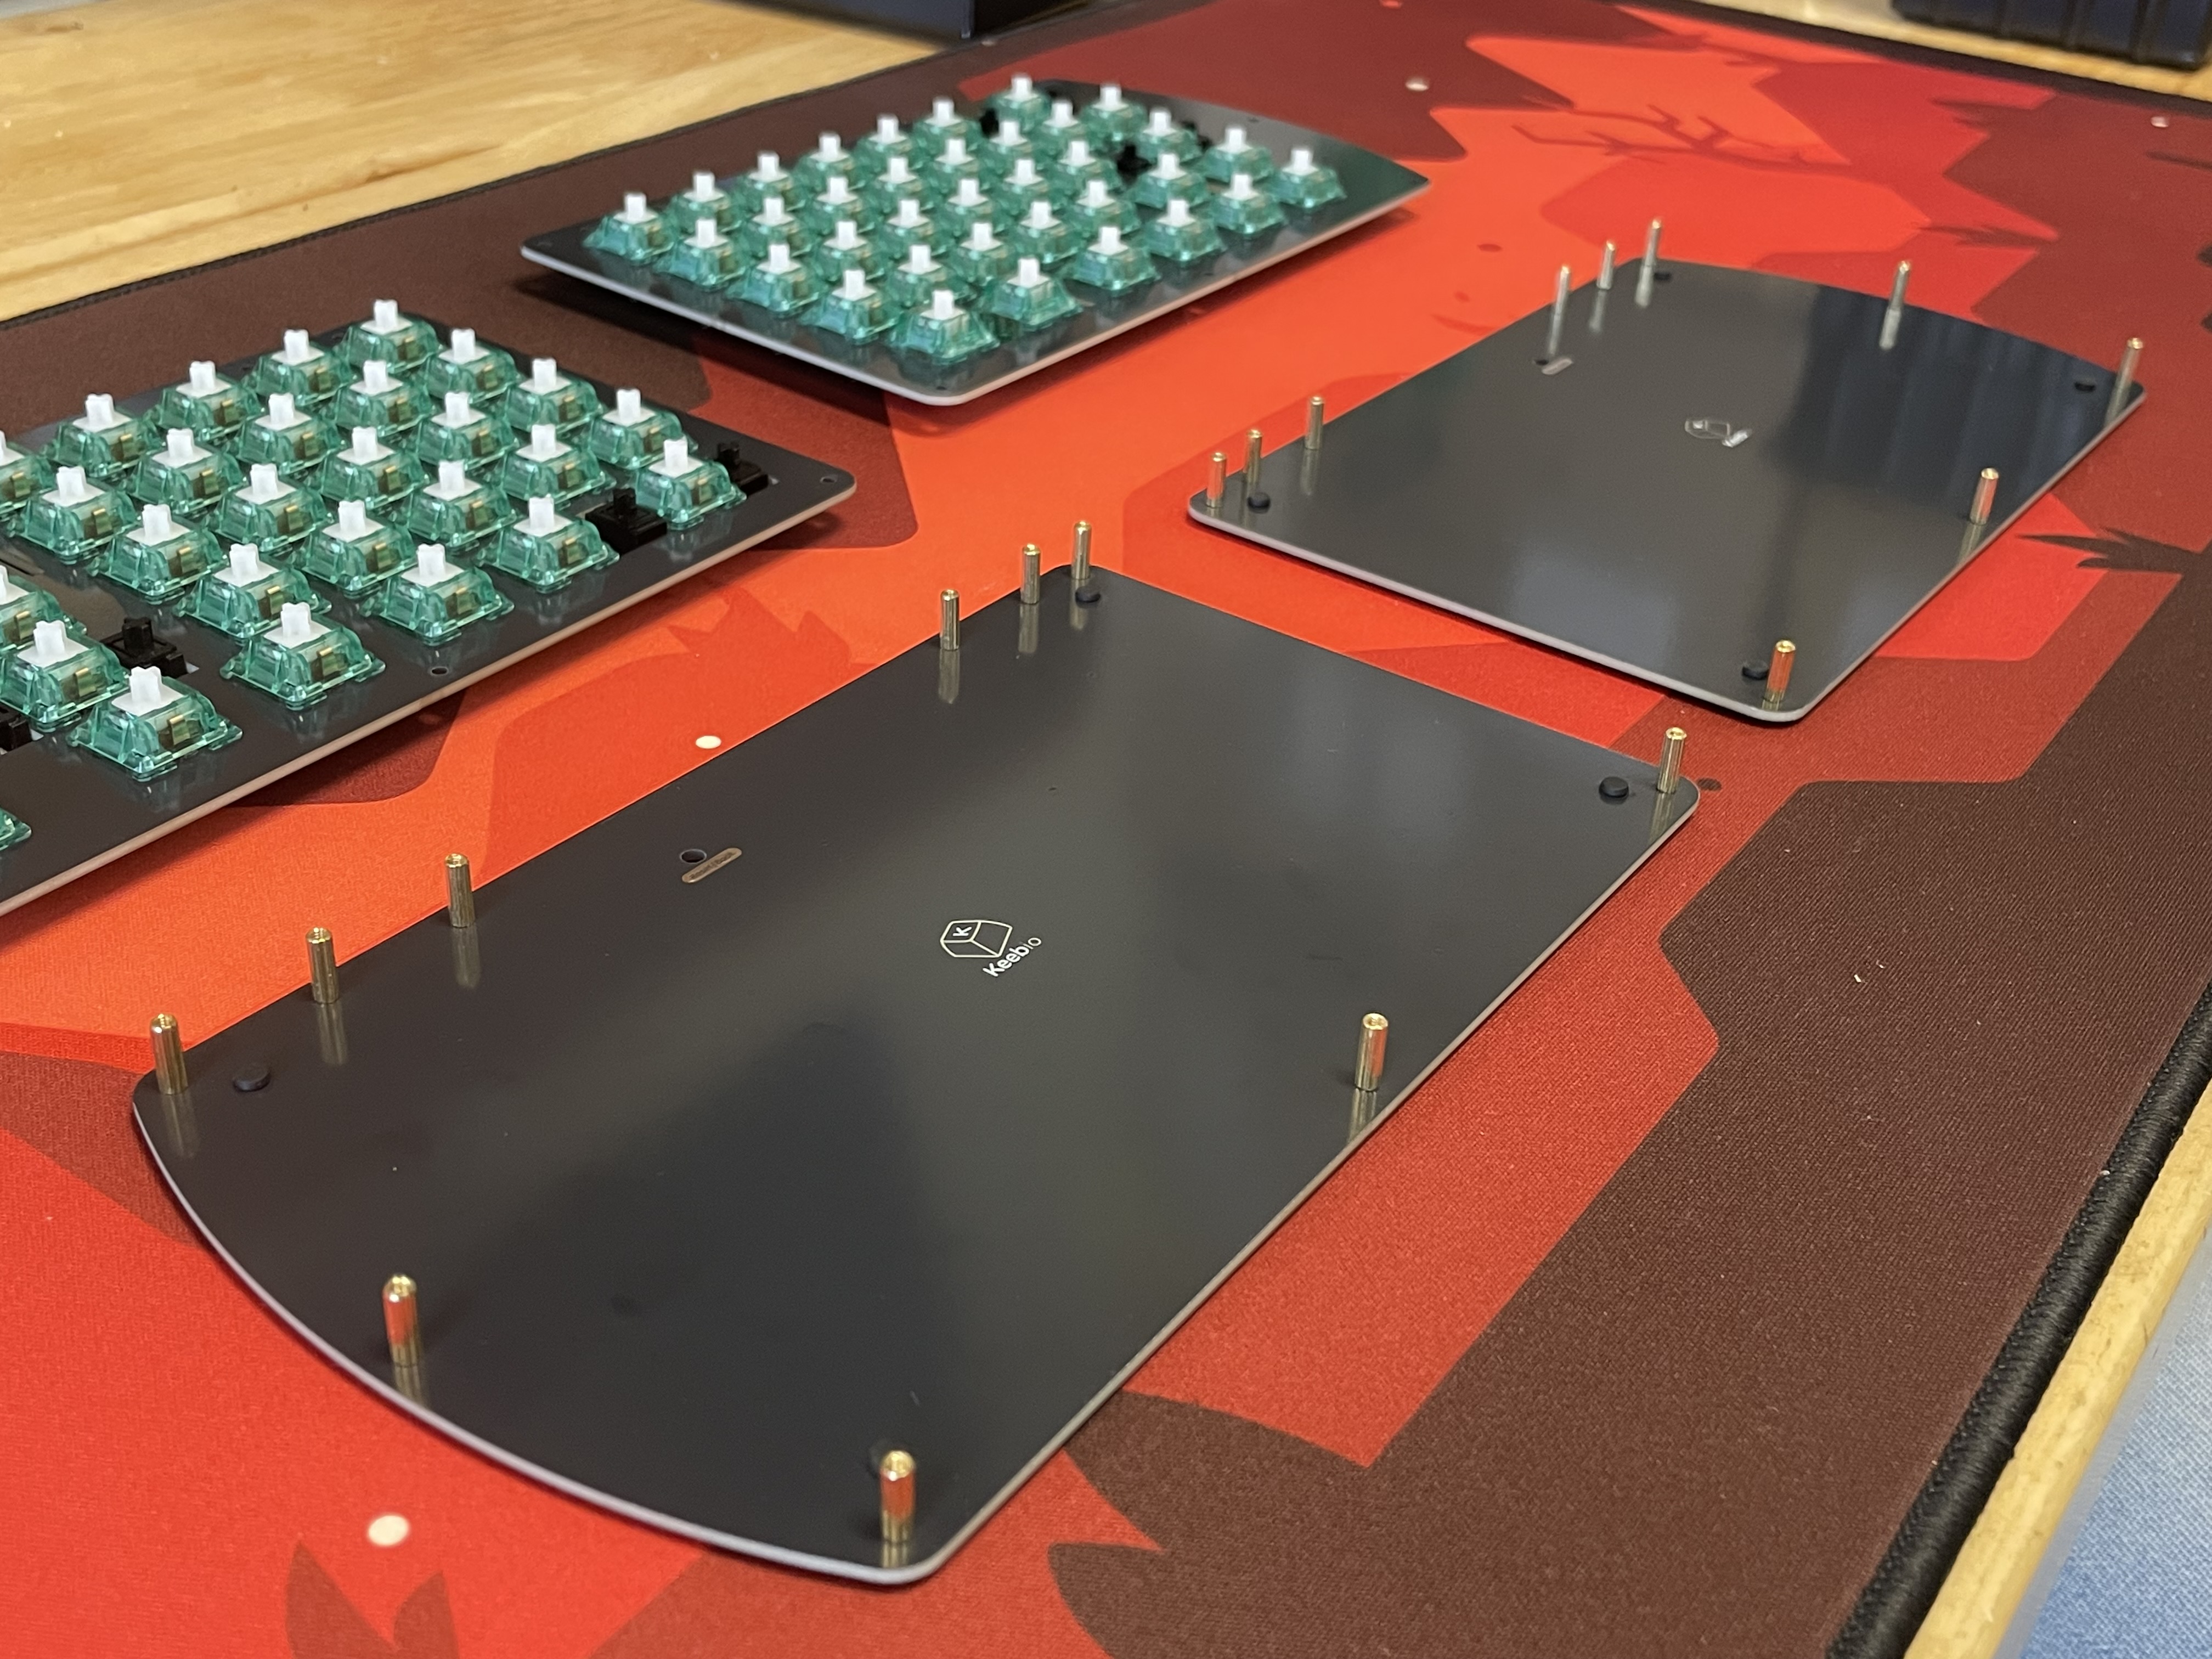
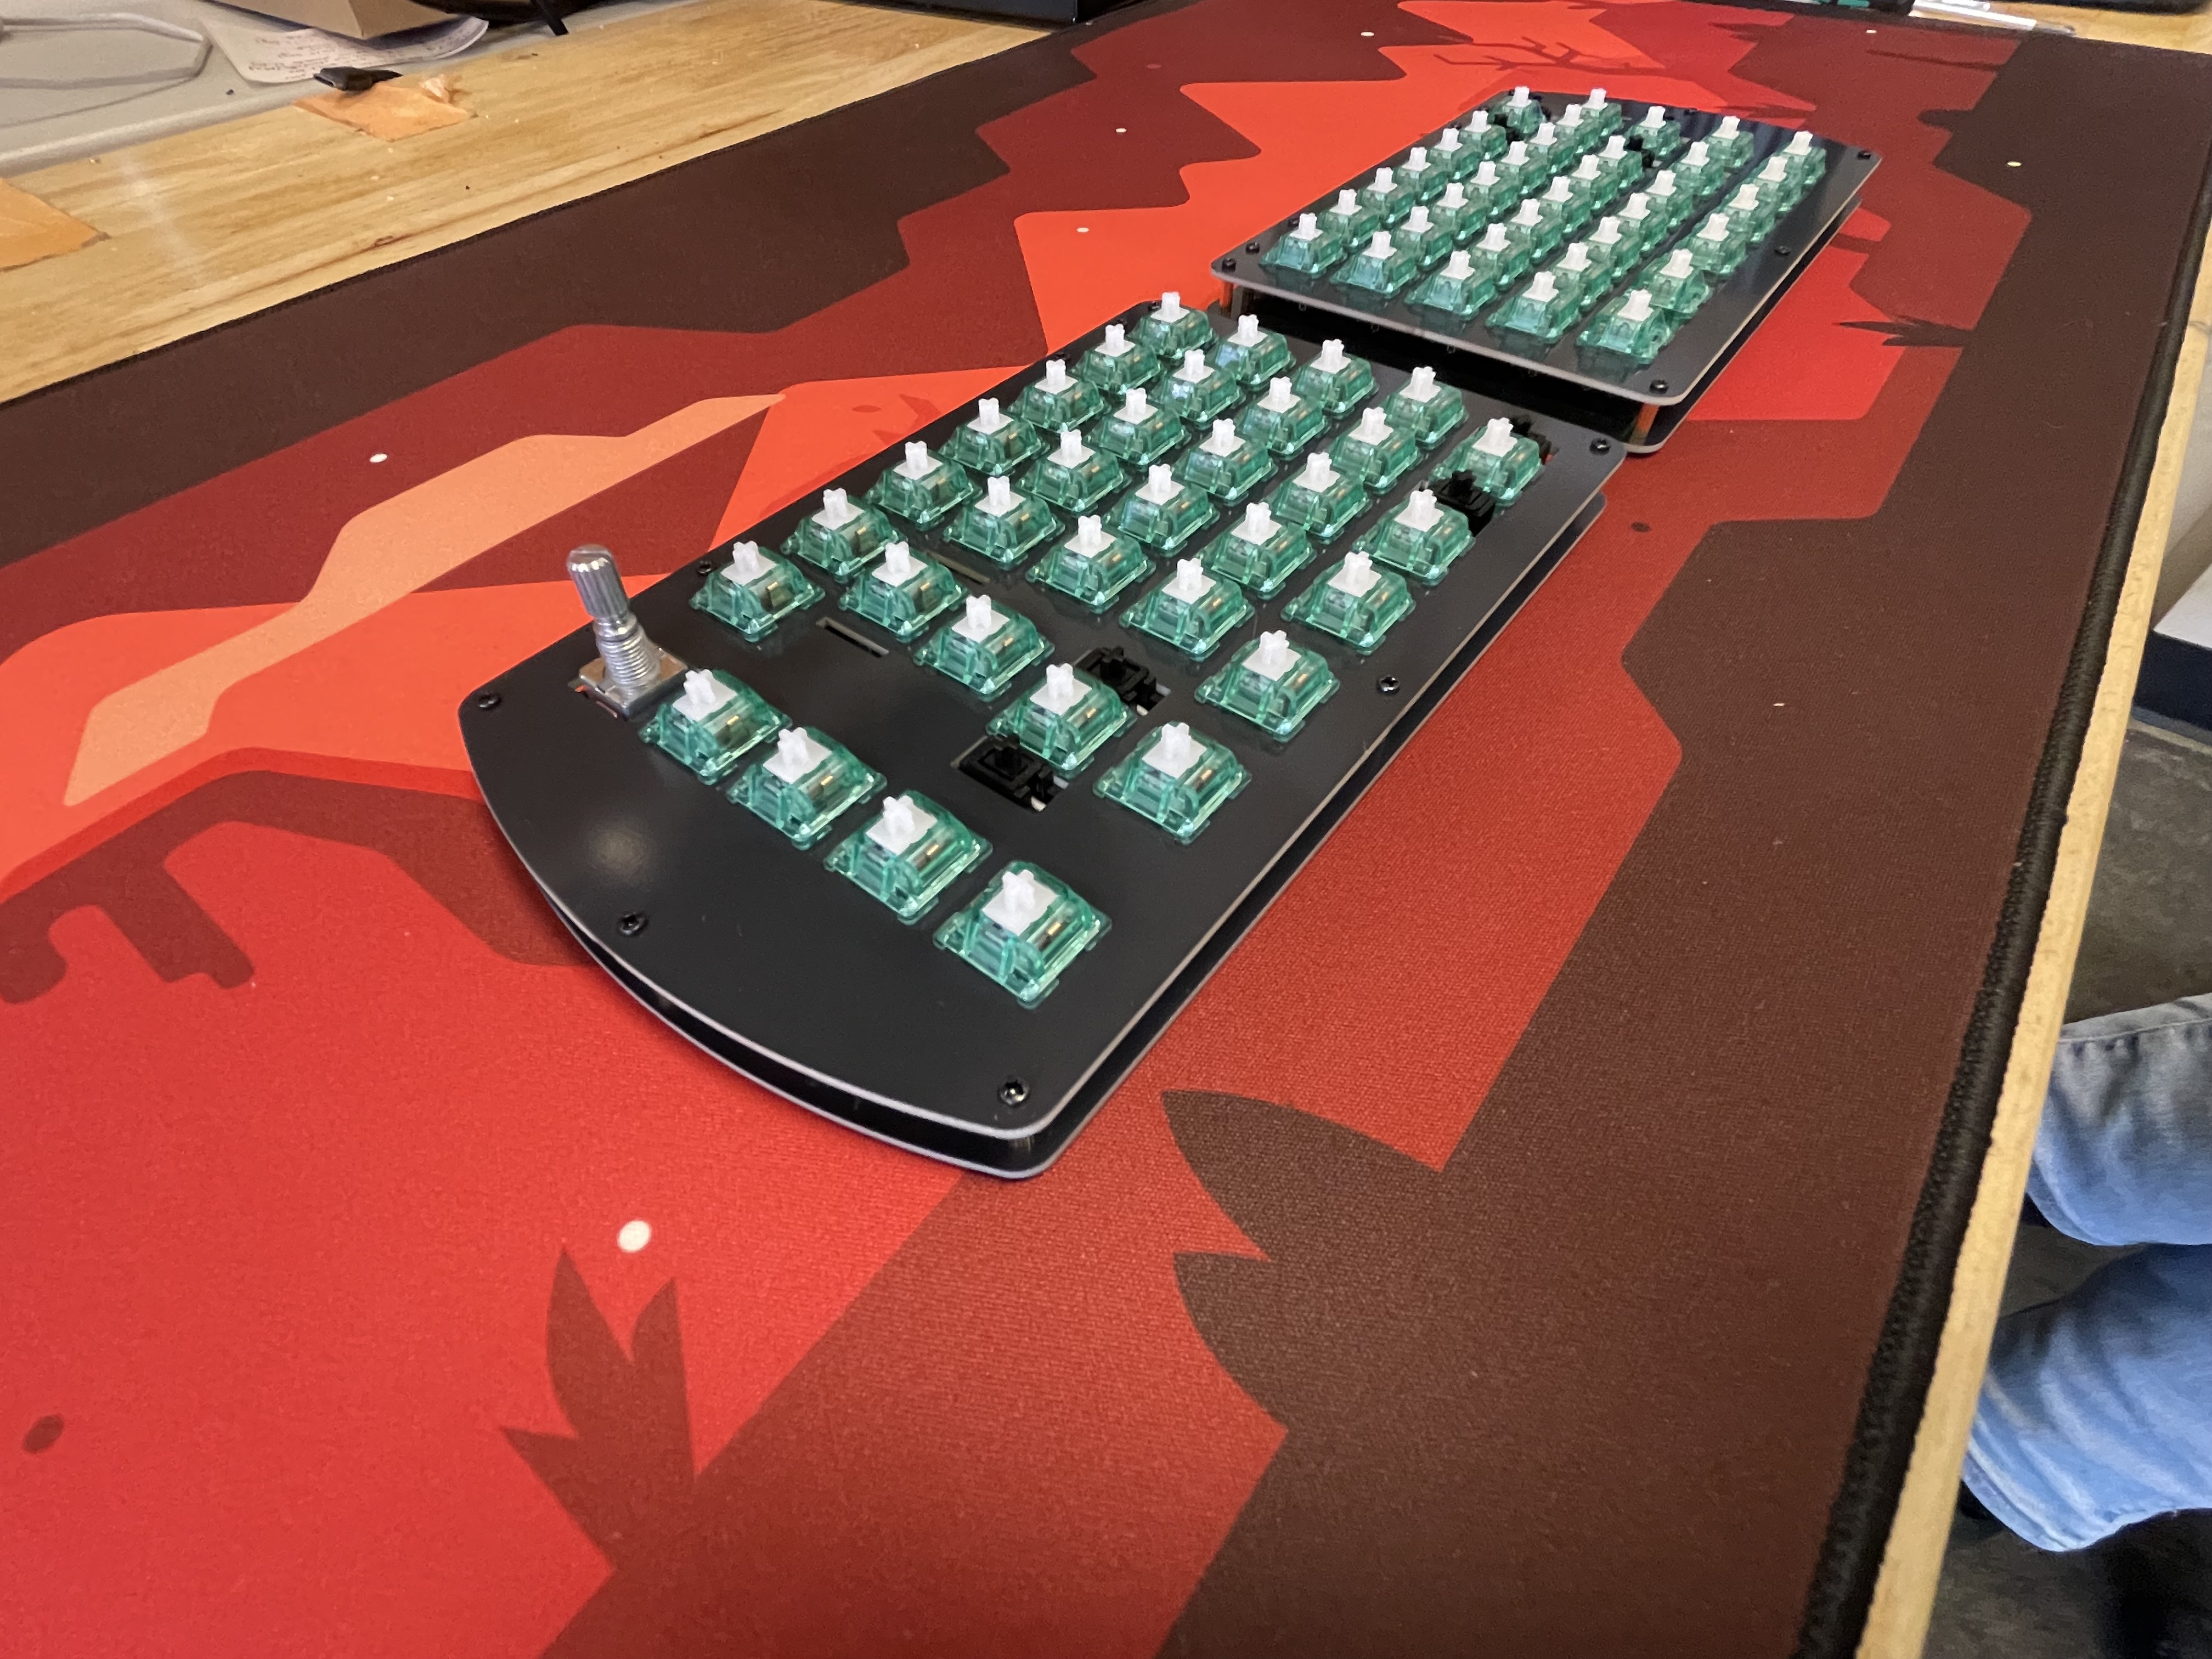
Assemble!
Now that all of the switches are in, install the standoffs into the bottom plate. Insert a screw through the top of the switch plate and attach a standoff from the bottom side of the plate:
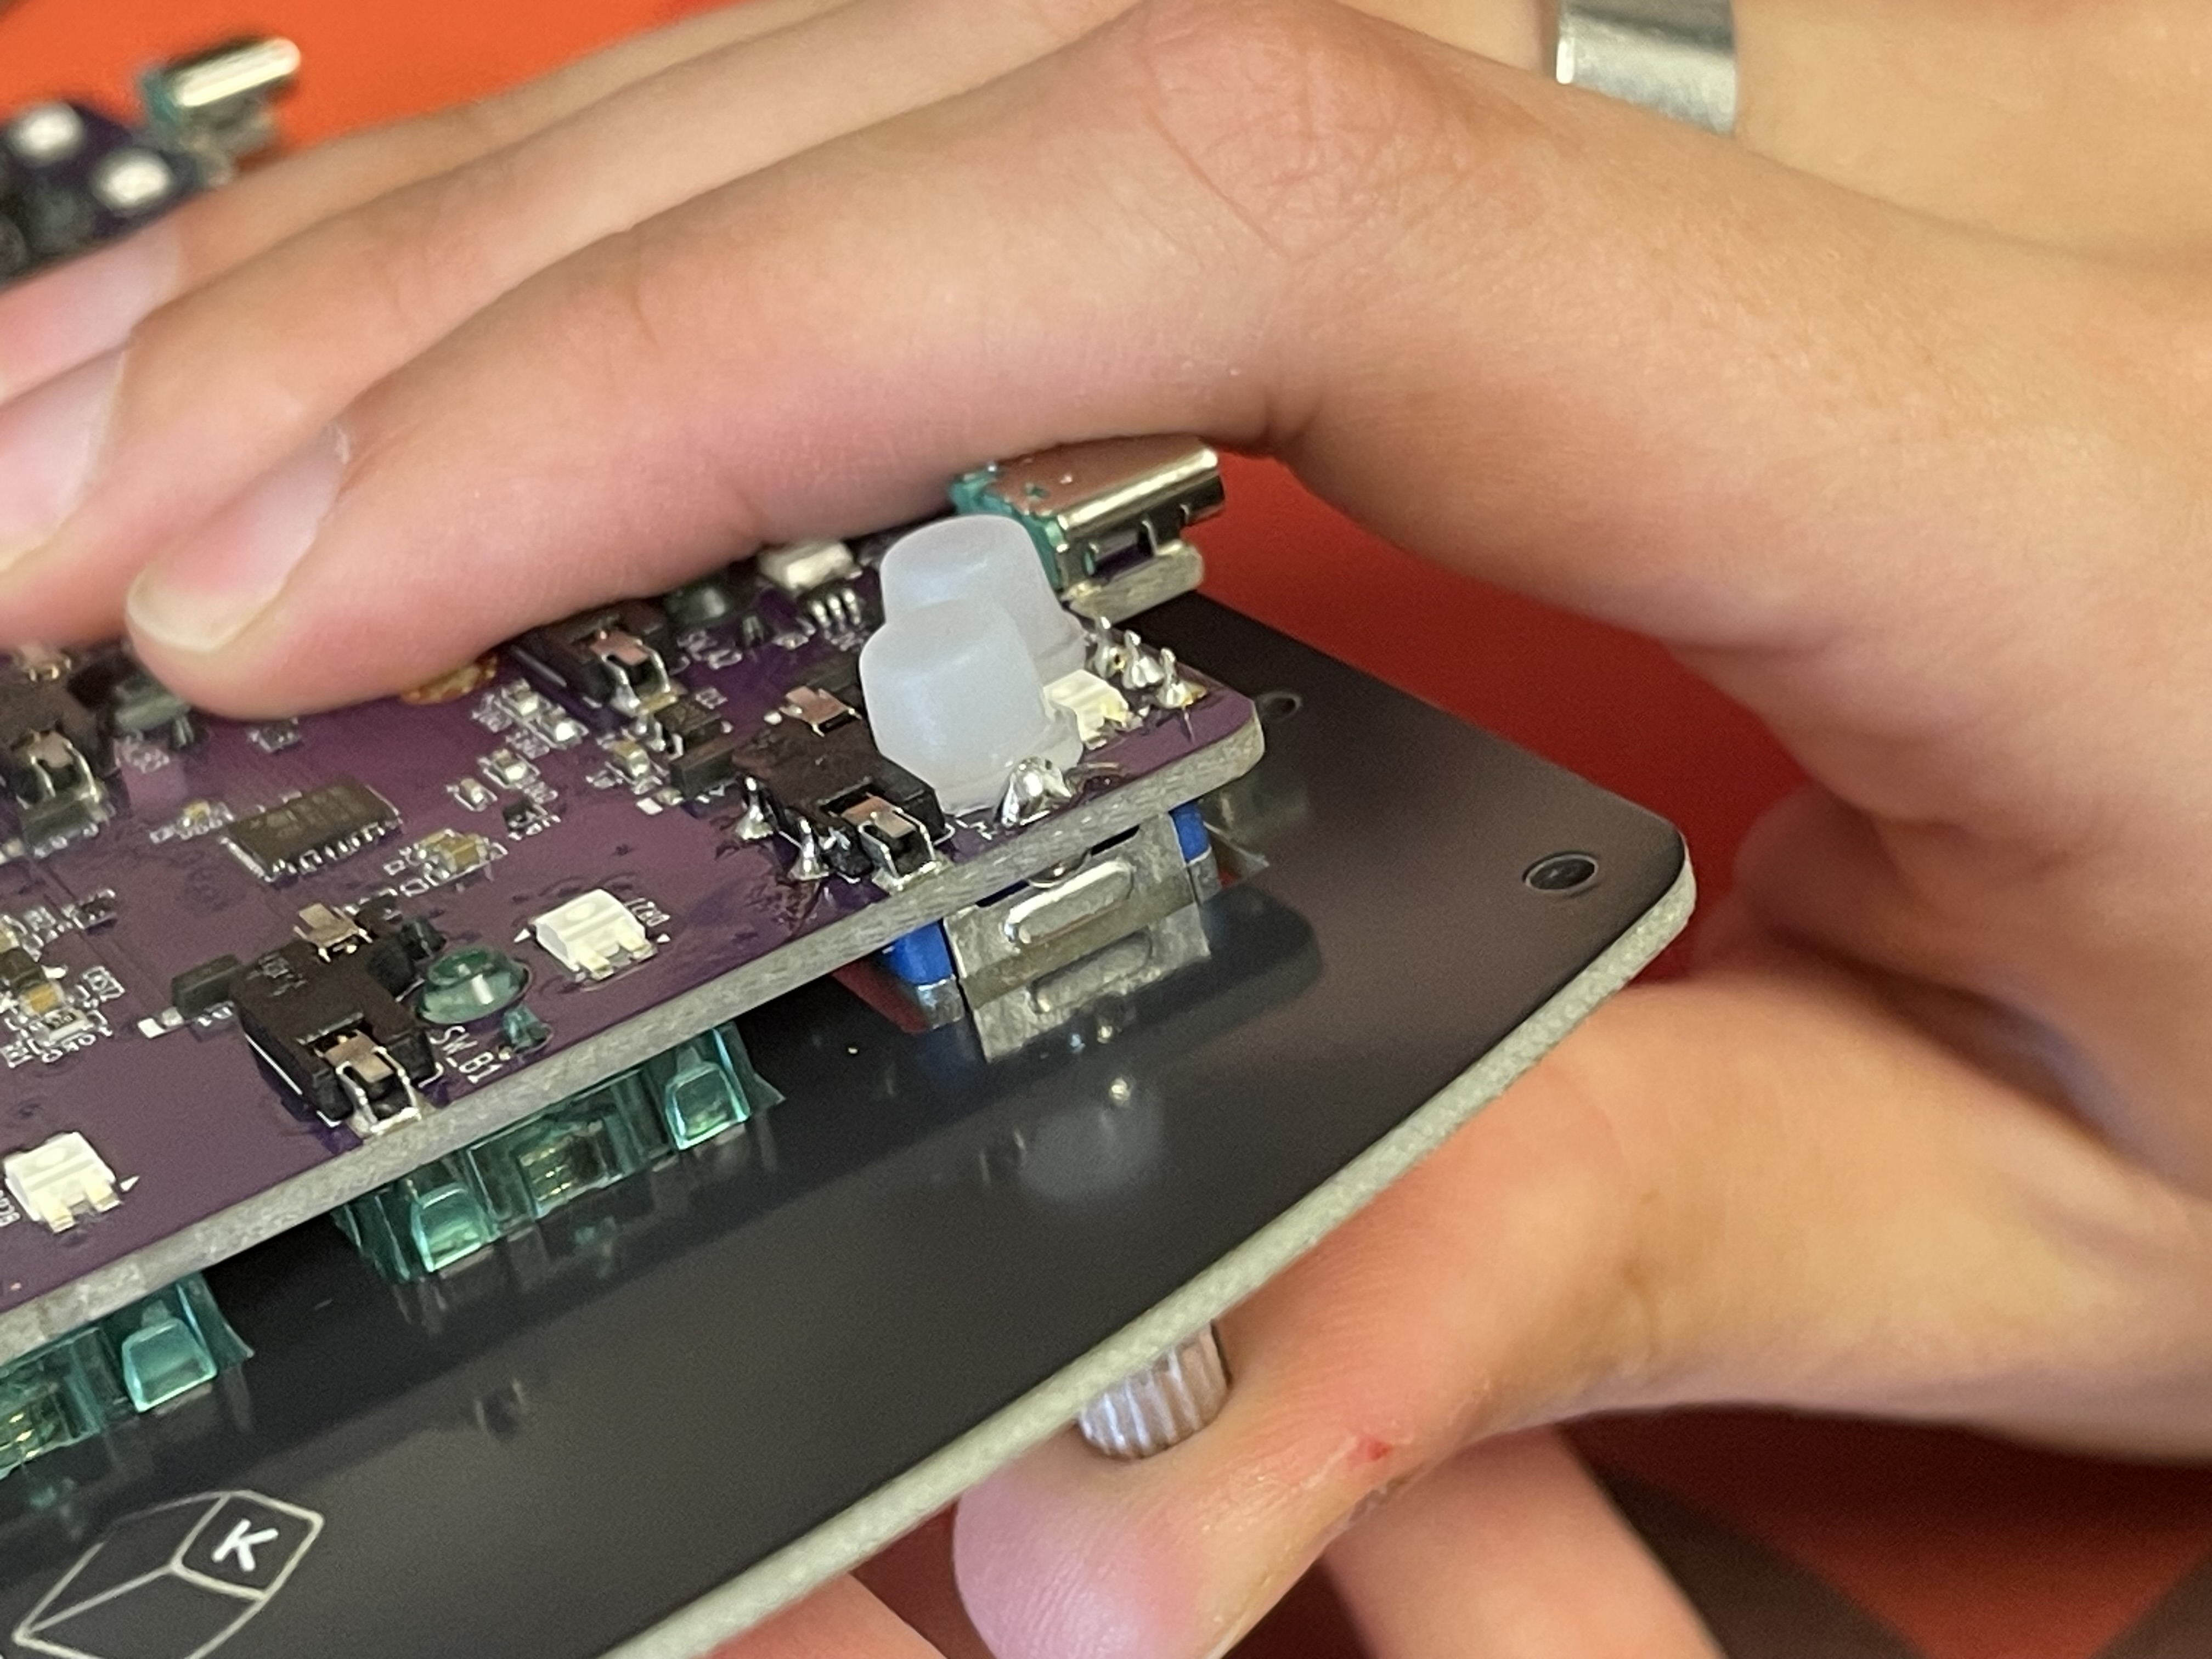
Add FLAHNS (optional)
Add FLAHNS bumpers to underside of PCB to help support it up. About 4-6 for each half with work fine.
Supporting the Encoder
If you installed an encoder, you will need to add one of the FLAHNS or piece of foam about 3-4mm thick that will sit in between the bottom of the PCB and the bottom plate. This will prevent the PCB from dislodging from the switches when pressing down on the encoder.
Put the bottom plate on top of the standoffs and screw it on.
All done now, repeat for the other half of the board!
Re-Programming Board Note
Want to re-program your board? We got you covered! Come look here.
Rejoice!
You have a split keyboard! Deck it out in some keycaps and conquer any task!